Enter your email address:

Delivered by FeedBurner

Homeschooling The Well Prepared Child: canning
Showing posts with label canning. Show all posts

Wednesday, July 8, 2015

(Not So) Wordless Wednesday #2

This post contains Affiliate Links.

    Tonight, we opened our Presto 16 Quart Pressure Canner for the very first time. I think Zoey might be more excited to be canning with it than I am. Why do I think that? Because, when I went into her room, I found her reading her canning book from The Organic Canner. :) How cool is that? 


What's she looking for? How to can green beans!


Disclosure: I am Amazon Affiliate and may receive a small compensation for including links on my blog. Buying through my links is not necessary, just appreciated. Amazon does not charge extra for linked items recommended by their affiliates. I only recommend products that I use and trust OR plan on using in the future. Please buy responsibly and do your own product research before buying anything online.

Saturday, December 27, 2014

A Very Merry 'Prepper' Christmas

This post contains Affiliate Links.


     It has been A Very Merry 'Prepper' Christmas for us! My hubby got us both Timber Hawk camo backpacks, a Camillus Spade/pick and Camping Hatchet combo kit and we both got our own tool sets. I got a pair of jumper cables from him as well and then my mom got us a Presto 16 qt Pressure Canner. 
     It has been a debate in our house on whether or not us girls would replace the old backpacks we had been using for our G.O.O.D. bags with good sturdy camouflage backpacks. On one hand, the backpacks are well used and a bit flashy. On the other hand, who would suspect we knew what we were doing with some girly cute backpacks. In an emergency situation, hiking and military packs are going to be a 'red flag' we have got some goodies! Debate has been decided since Hubby got us these. Zoey has already transferred over her gear into the new packs. They have lots of pockets and zippers and cool spaces to store all of your big and small gear. There is also padding for back support and buckles to go around your waist and chest. I'm going to help her repack the bag because she found it is a lot heavier to carry than her old G.O.O.D. Bag. You can read more about my daughter's OLD Get Out Of Dodge bag HERE. 
     Why tools and jumper cables? Well, when I went to go fix my son's Blazer, I realized I had no tools in my truck, (luckily he had his) and the jumper cables in my truck won't jump off anything! I mean, why on Earth do I even have these jumper cables if they don't even work? Sheesh! Wasted space in my truck, as far as I am concerned! The cables came in a little bag with a pair of no slip grip gloves and a pair of safety goggles. Zoey likes to build stuff, and when she heard me talking about needing a tool kit for my truck, she chimed in she needed tools as well. No more borrowing Daddy's hammer for her! We got different kits and we are both very happy with them. Mine are a little bit geared to home rather than a vehicle, but that is easily fixed. Really, all I need is a good socket and wrench set and I will be good to go! I think they will fit into my little tool bag along with the other tools.
     The spade set has a compass on the bottom of the handle. The handle also unscrews so you can put stuff in it. It is tri folding so you can use it as a spade, a pick, or just the poker part of the pick axe. Zoey keeps calling the hatchet a 'Tomahawk.' I decided we needed to do some research on the subject, and found THIS article. Turns out, we were both right. I told her we were going to go out and chop some wood soon. She is excited. We just need to find out from the hubby, where we can chop. He is a bit particular about his land and knows every little tree and bush.  We don't want to get in trouble for chopping down the wrong ones! :D 


     Do you see our little tree behind all the gifts? Our tree is only about 3 ft. tall. Our living room area in the house is very small. The only place we have for a tree is between the front door and the bathroom door. We don't mind having a little tree. It is quite homey. 
     We are both really excited about the Presto 16 qt Pressure Canner. Since Christmas, Zoey and I have thrown around ideas on what we will can first. I think we have decided on pinto beans and ham. We have a lot of pinto beans, and we have a lot of extra ham left over from our Christmas dinner. Now we need some jars! 

We will share all of our new adventures with our new Christmas presents in the next few weeks. Stay tuned!

So how about you? Did you have a Very Merry 'Prepper' Christmas? What did you get? 


Disclosure: I am Amazon Affiliate and may receive a small compensation for including links on my blog. Buying through my links is not necessary, just appreciated. Amazon does not charge extra for linked items recommended by their affiliates.  I only recommend products that I use and trust OR plan on using in the future. Please buy responsibly and do your own product research before buying anything online. 

Sunday, November 30, 2014

Our First Jelly- Red Jalapeno


We are not very big jelly eaters. Maybe every once in a while we will eat it, but not enough to get all crazy about canning jelly. We ended up with a whole lot of jalapeno peppers from our garden and our amazingly awesome neighbor, Bree, brought over more. I didn't know what to do with all of these peppers, we are not big pepper eaters either! Good grief, so many peppers, so little eating going on! My sister and brother in law are huge spicy food lovers. In the past, I have bought Jalapeno Jelly for them from a friend of mine. So, why not make something jalapeno for them? 
     My first idea was actually more like a jalapeno syrup you pour over a cream cheese bar and eat on crackers. For the life of me, I couldn't find a recipe for it, and no one I talked to in my canning groups really even knew what I was talking about... But I know I have eaten it somewhere before. After about a week of asking and researching, I finally gave up. Jalapeno Jelly it is! 
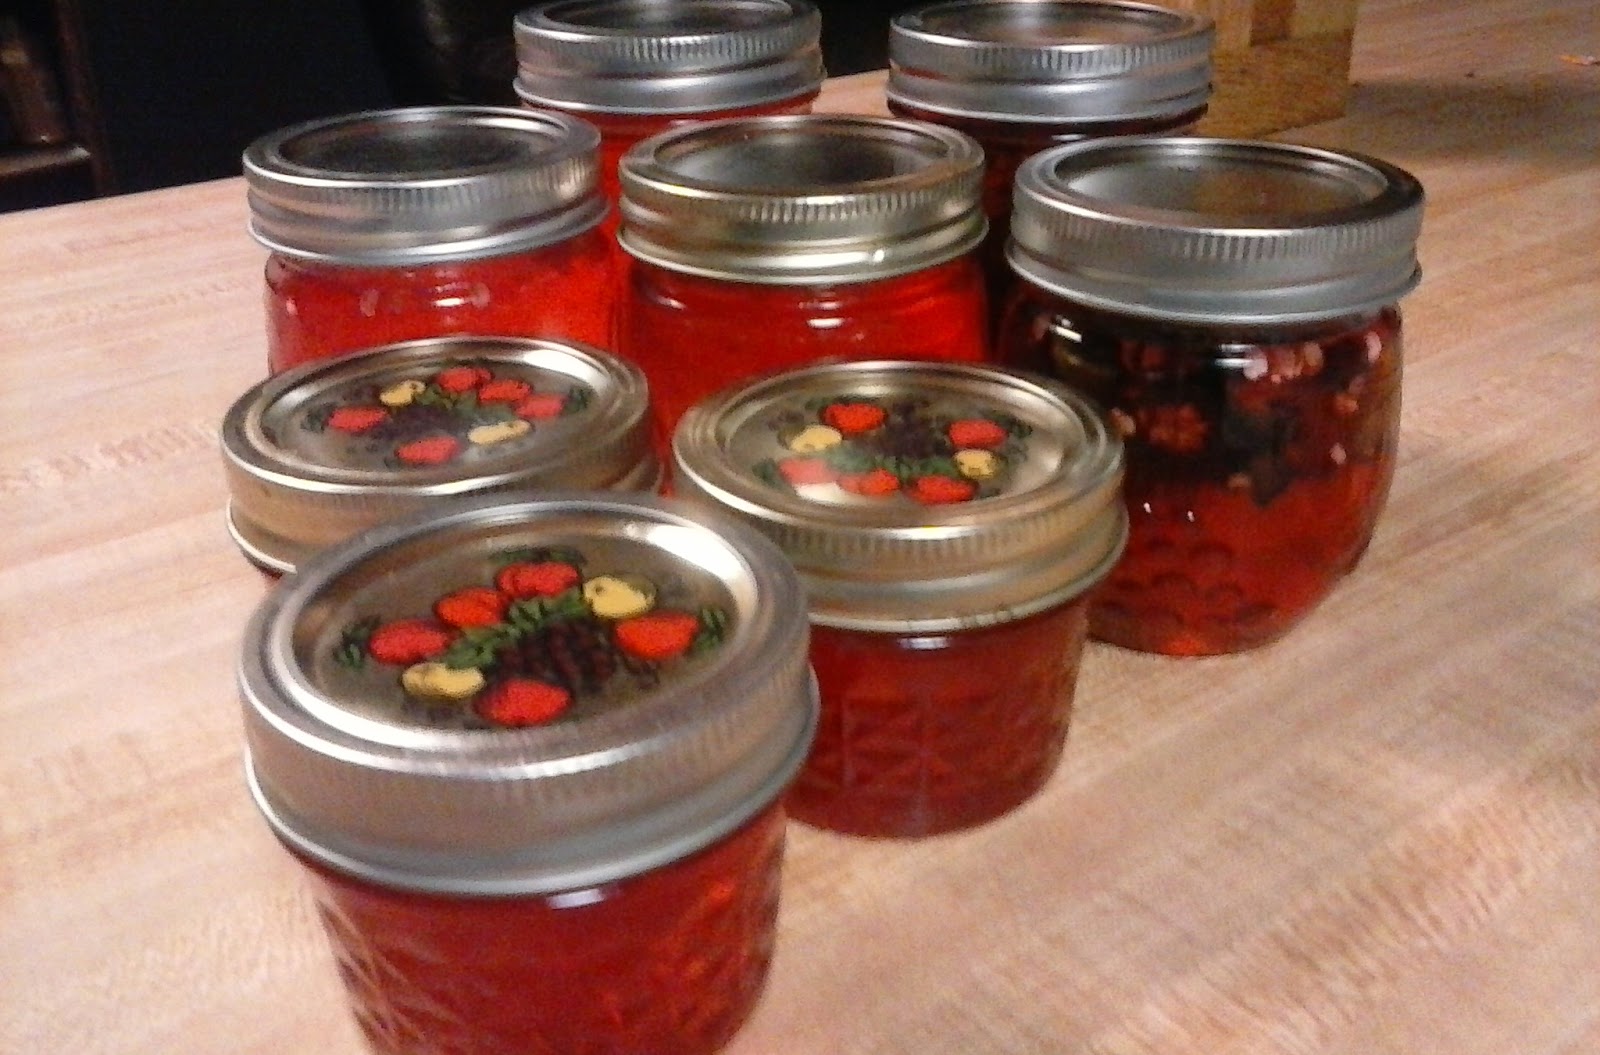
     I found a recipe on Taste Of Home that I thought looked pretty easy. Zoey and I got to work! I sliced up all the jalapenos (with gloves on) but we could not get our hand crank chopped to dice them up in small pieces. We went ahead and boiled them sliced. Zoey added all the ingredients, including some red food coloring. She did not think it looked very yummy in it's normal light yellowish color. I poured the extremely hot liquid into the jars. We did not strain the jalapenos from the liquid, like the recipe calls for. We strained the jalapeno slices into 2 of our jelly jars and then added the jelly liquid over them. After all of our jars were filled, we water bathed them for 5 minutes.
     The jelly set perfectly, except for the 2 we left the jalapeno slices in. They were more syrupy. Yea! Maybe we figured out how to make the yummy syrup to pour over cream cheese? We ended up with 8 jelly jars. (I don't even know what size they are. They were given to us from a friend on Facebook.) There was a tiny bit left over that would not fit into the jars. We poured it into a small bowl and placed in the refrigerator. After it had set, we tried a little on toast with butter. I was really surprised; it was good! Not too spicy, but sweet with a kick to it on the end! 


     I gave my sister her jar, they have yet to open it. They are saving it for a special occasion to eat over cream cheese. I'm a bit disappointed. I really wanted them to try it and tell me how it was. I thought at least with Thanksgiving in full swing, they would have eaten it sometime or another... Nope. 
    On Thanksgiving with my in-laws, Zoey decided to pull out all of our food stuffs we have been preserving and show EVERYONE! She wanted to open a jar of the jalapeno jelly for everyone but I didn't really want a jar open that would sit in our fridge and spoil. When she showed my father in law the jelly, he asked to try it. HE LOVED IT! He snuck the remainder of the jar into his jacket pocket to take home. Zoey was so proud and beamed her radiant smile. Feels pretty good to finally have someone like our jelly. He might be getting some more for Christmas (his suggestion!) 


Hot Pepper Jelly from Taste Of Home

1/2 cups white vinegar
1 medium sweet red pepper cut into wedges (we used neighbors mixed peppers)
2/3 cup of chopped habanero peppers (we used regular)
6 cups of sugar, divided
2 pouches (3 ounces each) of liquid fruit pectin
1 teaspoon of red food coloring (optional, try green too)

Directions
1. Place vinegar and peppers in a blender; cover and puree. Add 2 cups of sugar; blend well. Pour into saucepan. Stir in remaining sugar; bring to a boil. 
2. Strain Mixture and return to pan. Stir in pectin and food coloring if desired. Return to a rolling boil over high heat. Boil for 2 minutes, stirring constantly. 
3. Remove from heat; skim off foam. Carefully ladle hot mixture into hot sterilized half pint jars, leaving 1/4 in headspace. Remove air bubbles, wipe rims and adjust lids. Process in a boiling-water canner. 
4. Serve with cream cheese on crackers

Yield: 5 half Pints

Editor's Note: When cutting hot peppers, disposable gloves are recommended. Avoid touching your face. The processing time listed is for altitudes of 1,000 feet or less. Add 1 minute to the processing time for each additional 1,000 feet of additional altitude. 

Now this recipe is taken verbatim from Taste Of Home. I have tried this recipe and had great results. If you have a problem with this recipe or any recipe from them, please contact them directly. They are serious about wearing gloves and not touching any part of your body when handling any hot peppers. Peppers contain oils that are hard to get off of skin and will burn you like wild fire! Use extreme caution! If you happen to get some on yourself, soak the affected body part in milk. Raw milk is best, but my milk in the fridge helped as well.   

Also, I am in no way affiliated with Taste Of Home. I am just passing on a recipe we happen to enjoy. :)


Monday, July 28, 2014

Oven Drying Zucchini

   
     One of our abundant garden items this year is zucchini. Only the kids and I eat it, and we just can't eat it as fast as it is growing. I thought about pickling it but we have also had a huge crop of cucumbers. Pickling at this time is out, but I might try that later on. What do you do with extra produce that can not be eaten fast enough? I thought of freezing it until I saw a post in one of my Facebook groups about drying vegetables. Excellent homesteading option for long term food storage! I do not have a dehydrator, and prefer to learn methods not requiring electricity. We are looking into making an outdoor dehydrator, but for now I decided to oven dry them. Lots of fruits and veggies can be dried this way. 
     Of course we started by researching Drying Zucchini in the Oven, and found a great article over at Real Food Mama that describes the process in clear and simple steps. Here is what we did with her info.

Oven Dried Zucchini

  1. We started by washing and drying our zucchini. We had 3 and a half large zucchinis we started out with. (I completely forgot to get photos of us washing, cutting and preparing our zucchini. :/ )
  2. Cut into 1/4 in slices. Any smaller than that, and it will dry too quickly. Any thicker, it might take too long. We did end up with some larger and smaller slices. My daughter (and I have to admit, myself as well) ended up making all sorts of sizes of slices by hand. This wold probably be easier with a veggie slicer of some sort. It is now on my wish list to get one. 
  3. Place slices on a cookie sheet in a single layer. Place in oven. 
  4. Set your oven to the lowest possible setting. My oven's lowest is 150 degrees. You are drying them, NOT cooking them! Think 'Low and Slow' while they are drying. Also, air flow is key in drying foods in your oven. I propped my oven open with a knife set on its edges in the door. You might have a better option and I would love to hear it if you do! 
  5. You must flip them over quite often to insure even drying on both sides and to prevent them from sticking to the cookie sheet. I figured this out the hard way. My second batch the next day dried a lot quicker since we sliced them all at the same time. I stored them in the fridge overnight and this might have caused them to dry a bit while they were in there. 
    This is what the look like as they
    are drying when you flip them.
    Ooops!
  6. Dry your zucchini until they are no longer flexible. They will be crispy to touch. My first batch took 6 hours. The second batch took just 4 hours.

  7. Store your dried and cooled Zucchini in jars or baggies. Note a whole sheet of dried Zucchini did not fill up a pint jar. Extracting the water significantly reduces the size of the slice. Zucchini is 96% water. 
  8. Now what do you do with your dried zucchini? I hear it is good in soups and sauces. I have never tried them before and have never used them in cooking. (Right now, my daughter is preforming an experiment on re-hydrating a piece of our newly dried zucchini. I will let you know how that goes on another post.) I would actually like to try them in lasagna layers. We did try them just they way they are and we all kind of liked them. My last batch I seasoned them with a dill/onion seasoning packet I had up in my cabinet. They were yummy! But I tell you, a little seasoning goes a long way! 
Do you have a good recipe that uses dehydrated zucchini? We would love to hear about it! 

Wednesday, July 9, 2014

It's A Dill Pickle Kind Of Day

   This post contains Affiliate Links.
    
     Today we canned the pickles we have been growing in our garden. Our neighbor, and very good friend, came over to help. This is not our first time making pickles. We LOVE our homemade pickles! I'm not sure why we can them, they never last long in our house. The best advice I ever received about making pickles came from one of the many youtube videos we watched. A guy in the video (It has been a while and I could not find the video again) said that even if you mess them up, your homemade pickles will be better than anything you can buy at the store. He was sooo right! 
     This is the first time we have canned our own homegrown cucumbers and dill. I am very proud to say I grew my own dill. I remember as a child visiting my grandparents house and their being jars of pickles with the funny looking plant in them. I could never figure out why it was in there. Those plants sure were hard, and not very yummy. I was little! Cut me some slack! :) 
     Here are our photos from today's pickling experience. We tried canning salsa as well, but it did not seal. Oh well, I guess we will just have to eat it! 


Here is my daughter mixing the brine and her cutting the cucumbers. (We got our brine recipe from Food.com) Photos courtesy of Neighbor Bree. 

Packing them in.


And season them up! 
We like lots of garlic, dill and a bit of mustard seed. 
A bay leaf is nice, too. 
Jalapenos added to one for my Brother In Law. 
(I lost a bet, so he gets his very own jar of pickles.) 

 Adding our brine mix. 
 Careful it's HOT!
Water Bath for 15 minutes.
 And Ta Dah!   
     There was actually a 5th jar of pickles, but they went home with Neighbor Bree. Like I said, the salsa did not seal. All I had left was the 'Big Box Store Brand' lids and it is common for them to buckle. I am thinking we are going to need more canning supplies soon. Our first jar of pickles has already been opened and are half gone... Ooops. :)

Another step towards self sufficiency! Food Preservation!

We would love to hear about your favorite canning recipes! 


Disclosure: I am Amazon Affiliate and may receive a small compensation for including links on my blog. Buying through my links is not necessary, just appreciated. Amazon does not charge extra for linked items recommended by their affiliates.  I only recommend products that I use and trust OR plan on using in the future. Please buy responsibly and do your own product research before buying anything online.