Enter your email address:

Delivered by FeedBurner

Homeschooling The Well Prepared Child: Zucchini
Showing posts with label Zucchini. Show all posts

Monday, August 17, 2015

Blossom End Rot

This Post Contains Affiliate Links.

     Homesteading, for us, has always been a 'Trial and Error' adventure. We have raised mini watermelons and squash, had mystery plants take over the front yard, potato bucket fails, strange eggs, and have two incubators full of eggs that never hatched. This, however, is one of the oddest things we have ever seen... 
What on Earth? 
It looks like something on an alien movie!

???
     So I posted the photo in a gardening forum. Someone mentioned blossom end rot. I did a little searching and found a photo that looked just like our crazy alien zucchini squash on THIS website. Blossom end rot it is! 


But what is blossom end rot? 

Blossom end rot is when the plants have a calcium deficiency. Like calcium helps to build our bones, calcium also helps a growing plant keep it's structure. If there is not enough calcium, the structure of the plant starts to break down at the end of the plant. The end where the blossom is, starts to get mushy and decay. We do have some that have developed the traditional blossom end rot. 

However, our end did not rot, it just mutated.

So How Do You Fix It? 

The Missouri Botanical Gardens suggestion is to test the soil PH, stay away from high ammonia fertilizers and get some Calcium Nitrate to help prevent the ends from rotting. 
     Another site recommended using Gypsum or Lime in your garden to help balance the soil for optimal calcium intake. Also, do not over water. If you notice blossom end rot on your plants, remove the affected fruit and spray with a calcium rich fertilizer. 

What Are You Going To Do?

Nothing. It is the end of the season and the garden is winding down. I think I will work on building up the nutrients in the garden for next year after the garden has died out for this year. 

So What Did You Do With The Alien Looking Thing? 


I let Zoey dissect it of course! :D We just had to see what was under all the craziness. And guess what we found... 


     Nothing much. Just looked like a regular zucchini. Zoey tried a nibble of it and said it tasted normal as well. (She likes to eat raw zucchini.) We did not eat the rest of it because, I already have 4 more waiting to be eaten. Zoey thought the pig might like it, so into the slop bucket it went. 

We love your comments! Do you have any crazy produce photos to share? 


Disclosure: I am Amazon Affiliate and may receive a small compensation for including links on my blog. Buying through my links is not necessary, just appreciated. Amazon does not charge extra for linked items recommended by their affiliates. I only recommend products that I use and trust OR plan on using in the future. Please buy responsibly and do your own product research before buying anything online. 

Tuesday, May 5, 2015

Starting The Garden

This post contains Affiliate Links.


     It is that time of year again! Spring is my favorite time of year. All of the new plants and flowers coming up. The birds are returning. Days become longer and warmer. Everything is just green and sunny and perfect! Time to start our garden seeds! 
     We started by going though our mess of a seed bag. All of our seeds we have been buying have been randomly thrown into a gallon size baggy and stored in the freezer. It was stuffed full of individual packets, (some new, some opened) and all of the random packs we created last fall when we harvested our own seeds. I did not realize how horrible this picture was until I tried to load it on here, but as you can see, we have many seeds. This is after we started to sort them. 
     Then we made a list of all the plants we wanted to grow this year. The whole family got involved and created the list. When planning a garden, I have found it is better to grow what your family will eat. AND in quantities that will be easily eaten or preserved. One year I had 10 zucchini plants. My husband will not eat it and the kids only in moderation. After a few weeks, kids were tired of it and I had no way to preserve it. Most of it was wasted, (thinking I could do something with it, but never getting around to figuring out what) or given away. Then, last year I only got a few tomato plants to grow. When we ran out of tomatoes, which was often, my amazingly awesome neighbor Bree kept us supplied with her juicy mators as much as she could. There was never enough.  Better to sit down as a family and decide what and how much needs to be grown. Okay, back on topic! Now that we had our list, Zoey and I selected the seeds we wanted from our sorted pile on our table. Then they sat there... till we got out of the hospital after my husband's accident. 
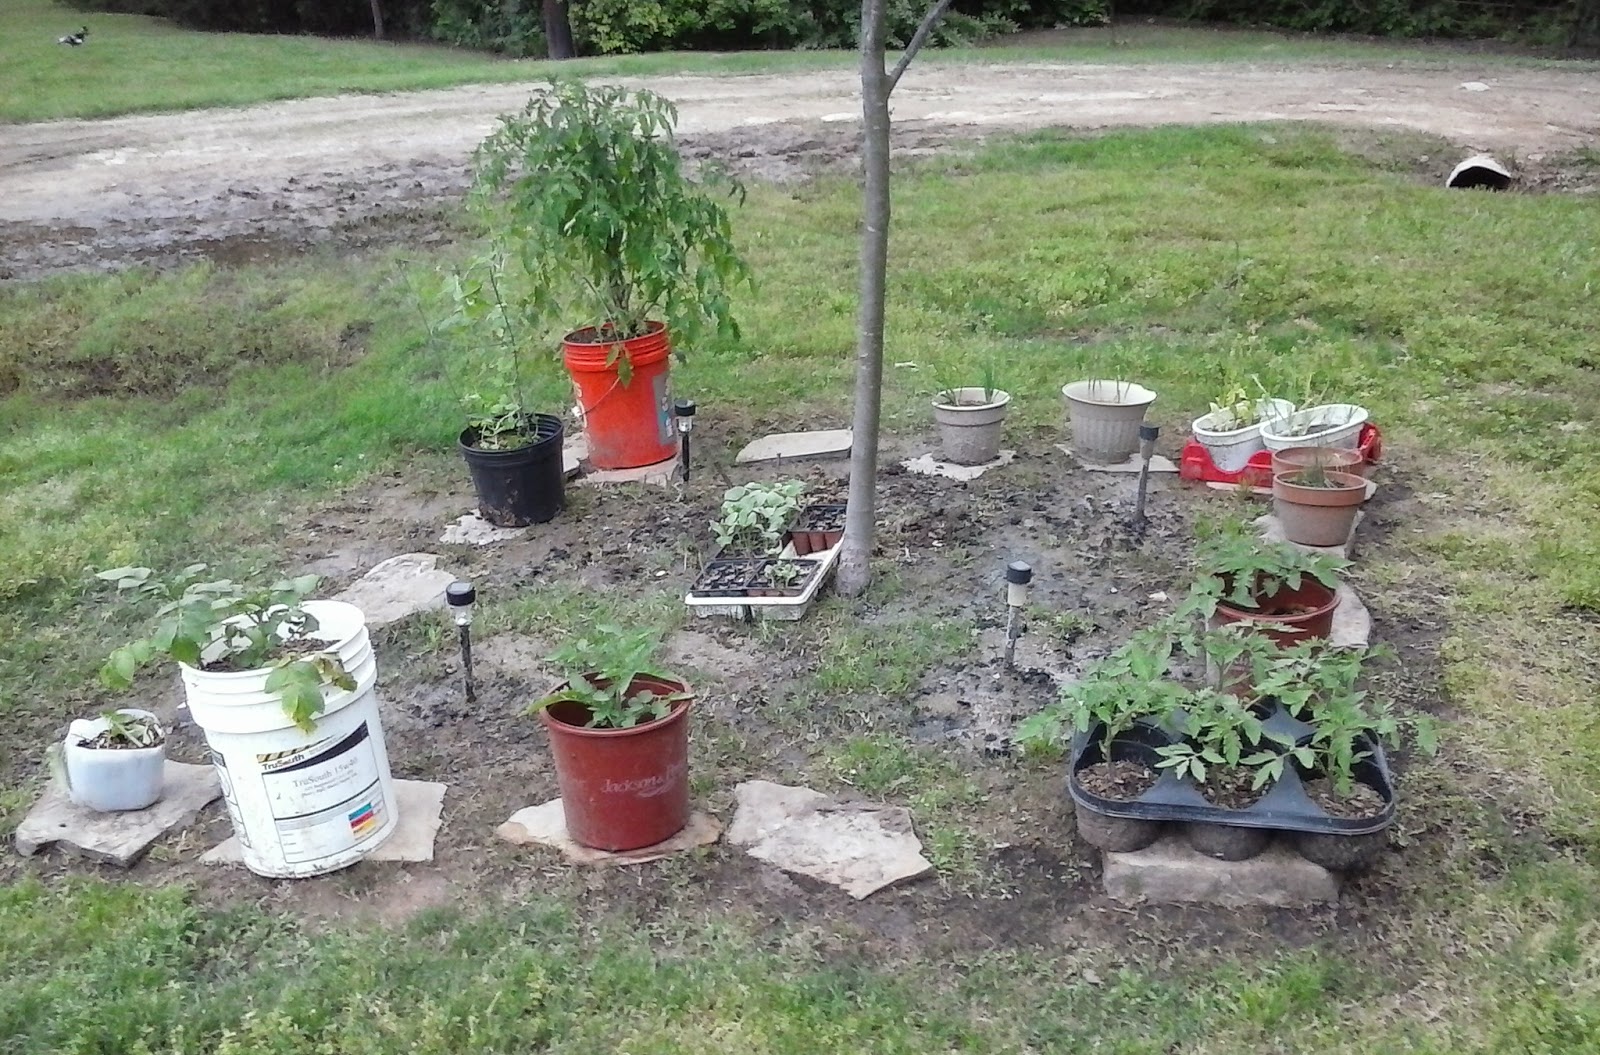
     Wouldn't you know it.. I forgot to get pictures of us starting our seeds! We mixed in some of our composted wood dirt with some of our garden dirt, potting soil we had left from last year, and the oven baked egg shells I make to feed back to our chickens. We placed the mixture into the 9 pack containers (kinda like THESE) some plants came in and I saved from a few years ago. Pickling cucumbers, regular cucumbers, watermelon, cantaloupe, jalapenos, and bell peppers were started in these trays. We already had started tomato plants, a new bucket of potatoes (white bucket), sugar snap peas, and onions. 
     
     Do you see the orange bucket with the big tomato plant in the back? That is my tomato plant I have been babying all winter! It grew but never produced any flowers until I got it out into the sun. I feel like I am WAY ahead of the curve on tomatoes! :D Only, guess what? It is not a regular tomato plant. It was a volunteer plant I got from my Amazingly Awesome Neighbor, Bree. It came up on the side of her grandma's house. She gave it to me, I grew it all winter.. and it is a CHERRY tomato plant. Kind of bummed about that. Thought we would be making salsa soon. On the bright side of things, at least my salads will be yummier soon. Just look at my cherry tomatoes already growing! 

     In the mean time, my son, Alex, tilled the garden. My husband did it last year, but since the accident, there was no way he could do it this year. My tiller is old and is a beast of a machine. I suppose if I had to run the machine myself, I could. But, with a big strong teenager around, why would I. ;) 
     
Have you started your garden this year?


Disclosure: I am Amazon Affiliate and may receive a small compensation for including links on my blog. Buying through my links is not necessary, just appreciated. Amazon does not charge extra for linked items recommended by their affiliates.  I only recommend products that I use and trust OR plan on using in the future. Please buy responsibly and do your own product research before buying anything online.

Monday, July 28, 2014

Oven Drying Zucchini

   
     One of our abundant garden items this year is zucchini. Only the kids and I eat it, and we just can't eat it as fast as it is growing. I thought about pickling it but we have also had a huge crop of cucumbers. Pickling at this time is out, but I might try that later on. What do you do with extra produce that can not be eaten fast enough? I thought of freezing it until I saw a post in one of my Facebook groups about drying vegetables. Excellent homesteading option for long term food storage! I do not have a dehydrator, and prefer to learn methods not requiring electricity. We are looking into making an outdoor dehydrator, but for now I decided to oven dry them. Lots of fruits and veggies can be dried this way. 
     Of course we started by researching Drying Zucchini in the Oven, and found a great article over at Real Food Mama that describes the process in clear and simple steps. Here is what we did with her info.

Oven Dried Zucchini

  1. We started by washing and drying our zucchini. We had 3 and a half large zucchinis we started out with. (I completely forgot to get photos of us washing, cutting and preparing our zucchini. :/ )
  2. Cut into 1/4 in slices. Any smaller than that, and it will dry too quickly. Any thicker, it might take too long. We did end up with some larger and smaller slices. My daughter (and I have to admit, myself as well) ended up making all sorts of sizes of slices by hand. This wold probably be easier with a veggie slicer of some sort. It is now on my wish list to get one. 
  3. Place slices on a cookie sheet in a single layer. Place in oven. 
  4. Set your oven to the lowest possible setting. My oven's lowest is 150 degrees. You are drying them, NOT cooking them! Think 'Low and Slow' while they are drying. Also, air flow is key in drying foods in your oven. I propped my oven open with a knife set on its edges in the door. You might have a better option and I would love to hear it if you do! 
  5. You must flip them over quite often to insure even drying on both sides and to prevent them from sticking to the cookie sheet. I figured this out the hard way. My second batch the next day dried a lot quicker since we sliced them all at the same time. I stored them in the fridge overnight and this might have caused them to dry a bit while they were in there. 
    This is what the look like as they
    are drying when you flip them.
    Ooops!
  6. Dry your zucchini until they are no longer flexible. They will be crispy to touch. My first batch took 6 hours. The second batch took just 4 hours.

  7. Store your dried and cooled Zucchini in jars or baggies. Note a whole sheet of dried Zucchini did not fill up a pint jar. Extracting the water significantly reduces the size of the slice. Zucchini is 96% water. 
  8. Now what do you do with your dried zucchini? I hear it is good in soups and sauces. I have never tried them before and have never used them in cooking. (Right now, my daughter is preforming an experiment on re-hydrating a piece of our newly dried zucchini. I will let you know how that goes on another post.) I would actually like to try them in lasagna layers. We did try them just they way they are and we all kind of liked them. My last batch I seasoned them with a dill/onion seasoning packet I had up in my cabinet. They were yummy! But I tell you, a little seasoning goes a long way! 
Do you have a good recipe that uses dehydrated zucchini? We would love to hear about it!