Enter your email address:

Delivered by FeedBurner

Homeschooling The Well Prepared Child: food
Showing posts with label food. Show all posts

Monday, December 22, 2014

A Foraging We Will Go!

This post contains Affiliate Links, but most of them are not. 

'Every thing we need to survive is in nature. Knowledge and effort are the only other thing required.'
-Sean O'Hair (A friend in UNITY) 


So What Exactly Is Foraging?

'Foraging is searching for wild food resources. It affects an animal's fitness because it plays an important role in an animal's ability to survive and reproduce.[1] Foraging theory is a branch of behavioral ecology that studies the foraging behavior of animals in response to the environment where the animal lives.' -Wikipedia

     A very important and often neglected skill for survival is foraging. Being able to find edible food in the wild will be a must in a SHTF scenario. I want to be able to provide for my family in any situation, and for my children to also be able to find food for themselves! Times are already tough. Foraging is a wealth of FREE food found in your area just waiting to be picked! 
     In today's times, people think you are nuts if you forage for food. Why when there is a grocery store on every corner? It was not always this way. For thousands of years people foraged for their food. It was not until grocery stores became so popular that people stopped looking in their gardens and in their yards for their daily meals. So why has this time old tradition become lost? Well think on this, when grocery stores opened they did not carry items you could find in your yard. Why would they sell something you could gather for free? As time went on and people became so dependent on shopping at grocery stores alone, they began to forget about the items in their yards. Convenience replaced what we used to do naturally. 
     While on our quest for self sufficiency and eating more natural, we discovered Wild Crafting and Foraging. (Those are affiliate links to help you understand what I am talking about, they are also on my 'wish list') We are also learning about healing herbs and how to be healthy naturally. In February, we will start taking herbal/medicinal classes at StarDragonFly Herbal Company. They are in a town about 20 minutes from us. Zoey and I visited one day when my mom had an appointment in the same town. I wish I had gotten pictures. The little shop is absolutely amazing! I will get photos next time for sure! We are excited to start learning with them! Our family friend from Time to Thyme sells some of her wonderful soaps and products in there. I squealed when I found them beautifully displayed on a table. 

Here are a few of our favorite wild foraging plants in our area.
(Okay, there is only 1 right now but there will be more soon!) Wild Onions


Here are some pictures of some of the plants we have found on our property..


Day Lillies 
Wild Violets

Honey Suckle

Dew Berries

White Clover 
Canna Lillies
Lichen
Heal's All
Henbit

Sheppard's Purse
 We have found a few others as well. At my mom's, I found these in her yard. Working on identifying them. Do you know what they could possibly be? 

Some sort of plantain or dock?


Great sites to learn about foraging, herbs, wildcrafting and useful recipes:
(I have not been paid or compensated for endorsing these sites.)

http://learningherbs.com/

http://herbalacademyofne.com/

http://www.foragingtexas.com/

http://melissaknorris.com

http://survivalathome.com

http://gnowfglins.com

http://survivalsherpa.wordpress.com

http://learningandyearning.com

Disclosure: I am Amazon Affiliate and may receive a small compensation for including links on my blog. Buying through my links is not necessary, just appreciated. Amazon does not charge extra for linked items recommended by their affiliates.  I only recommend products that I use and trust OR plan on using in the future. Please buy responsibly and do your own product research before buying anything online. 

Saturday, October 11, 2014

We Butcher A Chicken...

WARNING- This post contains photos of a family sending their own chicken to freezer camp! If you are not the chicken killing type, or if you are disturbed by information or images of animals being butchered, please, DO NOT READ THIS POST. We are on the path to self sufficiency, and raising our own food is part of this journey.


"We butchered a chicken today. Great life lesson and anatomy lesson. There is something... satisfying... to be able to provide a meal for your family that you know what it was fed, you know how it was treated, you know how it was butchered, and you know how it was prepared. I don't know if we will ever do another, but, we are happy with today." -Personal Facebook Post February, 2014

     We have become a society disconnected with our food. Rarely does anyone know where or how their food is processed. We buy our meat in nice, little wrapped packages, and not once do we question where it came from. How were they raised and in what conditions? What were they fed? How was it processed? The chicken from the stores is kept in giant barns crammed full of thousands of chickens, all pecking at each other, or standing there waiting to die. Don't believe me? Type in your computer, 'what are chickens fed to make them grow so fast?' and see what comes up. Quick link to Wikipedia says, well it says a lot.. Just read for yourself.
     I am in no way condemning anyone for eating supermarket chicken. I buy it all of the time still. My family loves chicken and I am not a lover of butchering my own meals. Honestly, I hope to grow out of this.  I have already come quite a ways from the girl I used to be. In the past, if it did not come from the supermarket, wrapped up nice and neat in Styrofoam and plastic wrap, I wouldn't eat it. We were given some hamburger from my uncle one time and while my family raved about how wonderful my meatloaf was, I was in the bathroom gagging and hearing Uncle Mark call out 'Calfy' to his cow. Fresh eggs? FORGET ABOUT IT! That was just disgusting! (My sister is still this way!)  In my quest for self sufficiency, however, I have grown to realize the importance of knowing where my food comes from. This is not important to everyone, but it is important to me.
      My husband's, mother's, boyfriend's. granddaughter (phew, did you catch all that?) raised chickens for FFA. When the project was finished, we were asked if we wanted them. They are Cornish Rock Cross and are breed to grow quickly. This also makes them unlikely to ever mate, lay eggs, or live past a certain age. And while I was not yet 'there' in my homesteading journey, I felt if I was going to 'Talk the talk...' I had better start down this road when I was offered the chance at no cost to me.
     My daughter helped me along on our first journey. We researched, read articles and watched youtube videos on butchering chickens. We decided to go with the 'cone method' of butchering. We took a milk jug, just like on the video we watched, and cut out the bottom of it. Then you put the chickens head through the hole and slit its throat. As it drains of blood it goes peacefully to sleep. Or rather, that's what is supposed to happen. Nothing could prepare us for our first time. Like I always seem to say, you think you know, but it never turns out how you expected. The chicken fought going into the milk jug hole, the incision clotted up instantly, then, the chicken cluck/cussed us, saying we were doing it wrong. Hubby came to the rescue with an ax. Note to self: Never, ever try that method again.
     Plucking took nearly and hour, even with dunking in the hot water several times. We have since learned that the skin is not that important to us, even when frying. It is a lot quicker to skin. We do not eat anything on the inside, so it is all boiled and fed to my dogs. We did find a lot of little orange balls we discovered were the beginning yolks of eggs. That is how we ended up keeping 'Prissy,' our first hen to lay an egg.
     It was very educational for my daughter. She learned a lot about chicken anatomy. She is like me (not crazy about killing the chicken) but she loves to identify the organs. She loves to cook our homegrown meat as well. She has very little attachment to the chickens because we have told her from the beginning these were 'food, not friends.' My hope for her is to become a veterinarian or be in another medical field. I believe she will be great healer one day.
     Just in case you continued to read, but were uncertain if you wanted to see the photos, I have saved them for last. The are not really terribly awful in my opinion, but this is your last chance to go check out one of my other articles. You can see my daughter make store bought Cornish Hens in my post HERE. Again, you are reading a blog about our homeschooling/homesteading family's quest to become more self sufficient. Thank you for your support.


Our FAIL...
 Getting the insides out.


 Don't you just love her protective gear!
An hour to pluck it and it still looked like this?
 The end result. 
     We decided to stuff and slow roast our chicken. We learned from our Cornish Hen dinner that we like seasonings, and this time we did it right. It was delicious and tender. I had forgotten to take a photo of it when we were finished cooking it. The photo above is what we had LEFT after dinner. Two adults and a 10 year old barely made a dent. I pulled off the rest of the meat and separated it into family sized portion freezer bags. We got 4 more meals out of this one bird. 5 meals for free. 

     We have sent several chickens to 'Freezer Camp' and I plan on sending more soon. If this is not your cup of tea, I understand. I used to be that girl remember? But it is now something I take pride in. My meat was raised by me. They were fed a healthy diet twice a day and also free range all day long. I know how they were treated, I know how they are processed. I know they were healthy and will provide a healthy meal for my family. Thank you for joining me on my journey.

Saturday, September 27, 2014

Save The Seeds!


"All the gardening knowledge in the world will be of no use, 
if you do not have seeds to sow." Kamay Flemens

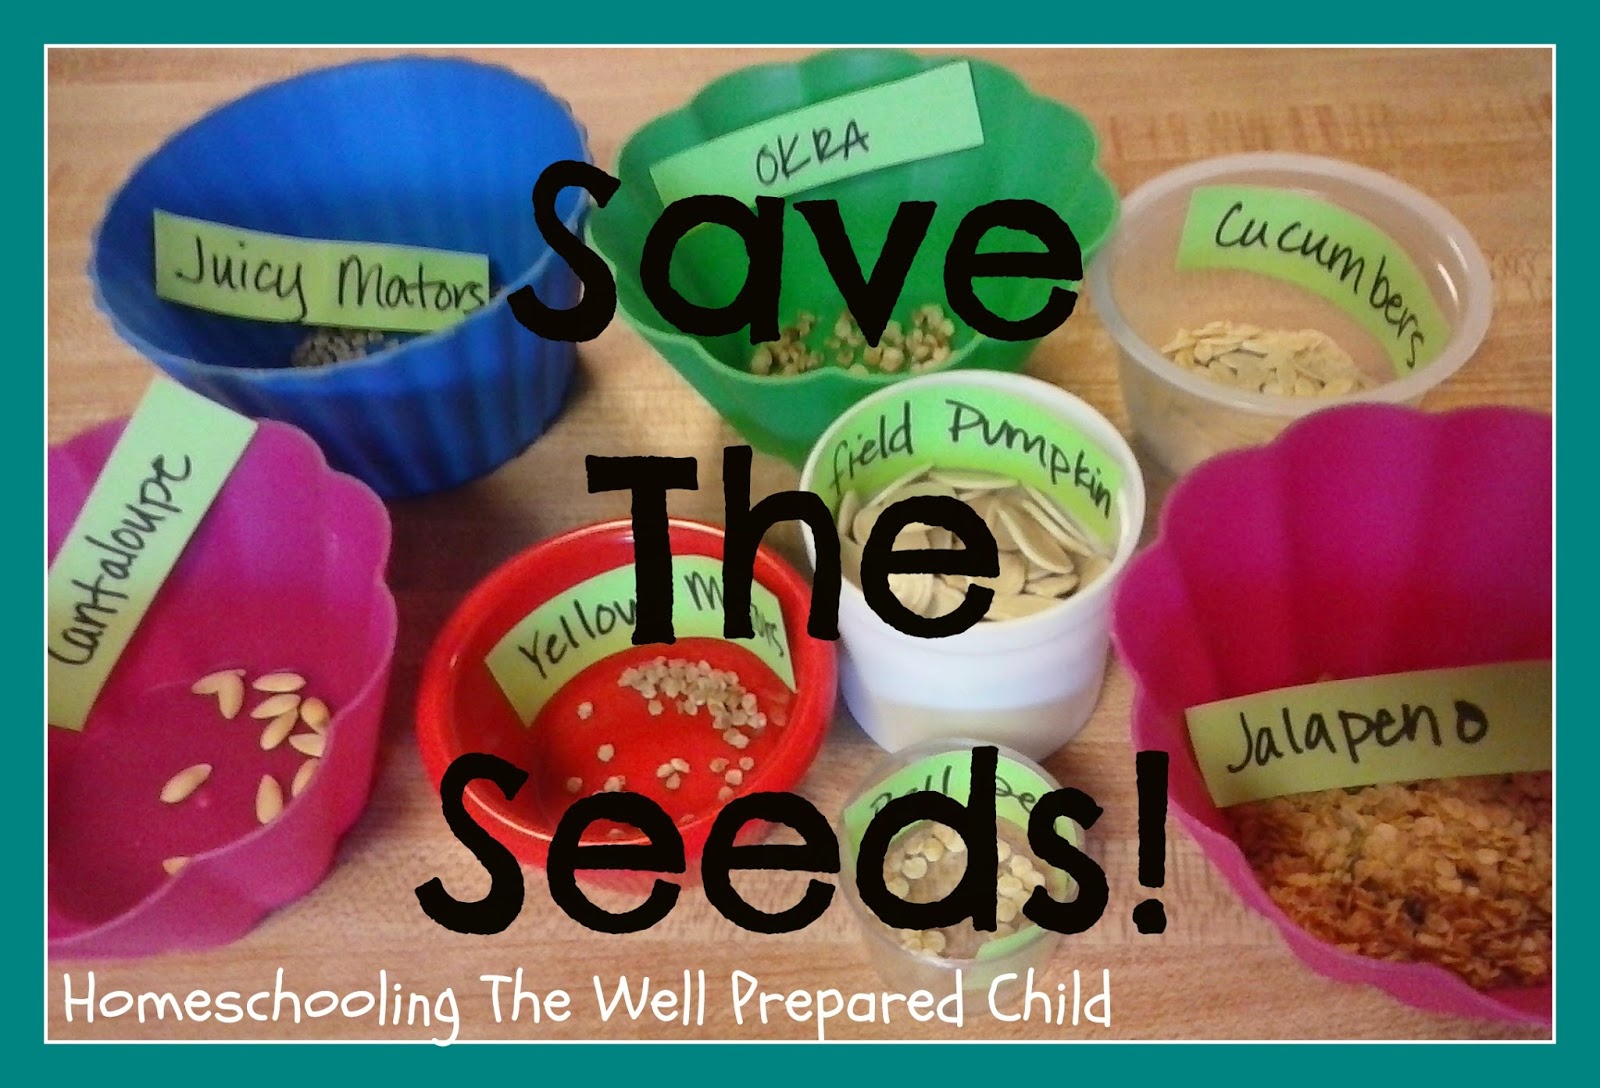
     For years we have saved seed packets from various stores. Just recently choosing to buy heirlooms to grow and save. Heirlooms are seeds that have been grown, harvested, and saved from generation to generation. However, seeds bought in packets, do not last forever. My endless thoughts of 'what if there were no stores' prompted me to get serious about saving our own seeds from the garden. Because I believe in teaching and learning as a family, we researched how to save seeds, picked the best fruits, and harvested them together. (Although, my daughter actually did most of the seed harvesting for us. I assisted and took photos. :) )
     I heard once, when saving seeds, to use the best of the best. Best plant, best producer, best tasting fruits and vegetables. We did not harvest seeds from our mini plants because we never want mini plants again! We still have plenty of the cherry tomato seed packets, so we did not save those either. We also choose plants we knew we would eat or be able to use for trade or barter. There is no point saving seeds from plant varieties your family turns their noses up to unless you have another use for them. 
     Here is a bit of what we saved. Not everything was photographed...


Okra- Carefully split the okra length wise, being careful not to cut the tiny seed balls. Use your thumb to gently pop the seeds out. When finished, make sure all green plant material is removed. Set aside for a week or two to insure full dryness. I am interested to see if this worked. They looked nothing like what I used from my store bought seed packet. 

 They dried all wrinkly and I don't remember the seeds in the packet looking quite like that. This photo is before they dried fully. 


Field Pumpkins- Carve open pumpkin top and remove all seeds. Rinse seeds in a strainer and make sure all pumpkin pulp is removed.  They sat in the strainer for a few hours so that most of the water dripped away. Then, we placed the seeds on a plastic plate and moved them around often to insure even dryness and to keep them from sticking together. 
Cucumbers- While making pickles, we had tons and tons of seeds left in the bowl from cutting the cucumbers. My daughter just collected them from the bottom of the bowl and took out all the seeds that had been cut in half. She used a strainer to wash them and make sure there were no pieces of flesh with them. Just like the pumpkins, we let them stay in the strainer for a few hours to make sure the excess water had time to drip off. 


Jalapenos- Although we do not eat these much except for in salsa and for spicy pickles, we saved the seeds from some jalapenos we used for a FAIL at cheddar poppers. While we cored them, we dropped the seeds into a bowl. They dried in the bowl for a couple of weeks.
 (When harvesting seeds from any spicy pepper, please use gloves! USE THEM! The seeds and the core are spicier than the green flesh. Even though I washed my hands thoroughly, and my hands did not burn, everywhere I touched on my body after that BURNED LIKE WILD FIRE! I just so happened to be suffering from allergies and had itchy eyes. It was brutal! If you do happen to get burned by the oils in the jalapenos, milk helps. I used a washcloth to scrub my hands and face with the milk. Raw milk from any source is better. Raw sources include cows, goats and even humans. Yes, booby juice works too, or so I hear.. no booby juice around my house anymore.)

Cantalupe- A friend of mine brought a cantaloupe to me from her father's garden. It had a lovely texture and was sweet and juicy. After digging out the seeds from the center, I placed them in the strainer and washed all the goo away from them. They drip dried and were placed on a plate to finish the drying process.  

Bell Peppers- They have been a test this year. They were not as big as a store bought bell pepper. I am not a big fan of them, but I wanted to use them in salsa. I never got the chance. We did not have the tomatoes we needed at the time to make salsa with them. When we had tomatoes, I had already cut up the bell peppers to save seeds or had given them away. We did test eat them raw. It is not something my family enjoyed. They will be good for trading and bartering if needed. 

Tomatoes- Now this one I will go into more depth on in another post. They are a huge staple in my household and I believe we could nearly live off of them. My whole family loves tomatoes. Before we got serious in seed preservation and looked up how to save tomato seeds, we tried a couple of ways to dry the seeds. First, we took the seed pulp from a tomato we cut and placed them on paper towels. The seeds stuck to the paper towel as it dried and they were not very nice looking. I tested one to see if it would germinate, and it did. Then we brainstormed ideas on how to do it so they would come out cleaner.. but that is all in THIS  post. :)

     Now at this point, can you imagine what my kitchen looked like? There were plates, cups, bowls, and paper towels all over the place. It drove me nuts! I don't have very much room in our house. There is no pantry, laundry room, spare room at all to store all of the drying seed containers we had at this point. I finally got smart and gathered every small container we have and put all of them in a casserole pan. Safe, secured, compact storage! It took a few weeks to actually feel they were all sufficiently dry enough to store away.  We used a variety of different small recycled packages to store our seeds in. A variety, because, we couldn't eat enough Tic Tacs fast enough. We are all about FREEcyle! :D 


     Have you tried seed preservation? 
Save The Seeds!
     
More great seed saving advice and FREE PRINTABLE SEED PACKETS at 104 Homestead. 

For a great definition of heirlooms, hybrids, organics and all the other seed lingo, check out Underwood Gardens post. 

Want to start your own vault of survival gardening seeds without preserving them yourself?  Survival-Seed-Vault-
     

This post contains my Amazon affiliate link to a survival seed vault. Although, I have not ordered from them, it is something I would like to purchase in the future. If you happen to buy one, let me know what you think of it!

Monday, July 28, 2014

Oven Drying Zucchini

   
     One of our abundant garden items this year is zucchini. Only the kids and I eat it, and we just can't eat it as fast as it is growing. I thought about pickling it but we have also had a huge crop of cucumbers. Pickling at this time is out, but I might try that later on. What do you do with extra produce that can not be eaten fast enough? I thought of freezing it until I saw a post in one of my Facebook groups about drying vegetables. Excellent homesteading option for long term food storage! I do not have a dehydrator, and prefer to learn methods not requiring electricity. We are looking into making an outdoor dehydrator, but for now I decided to oven dry them. Lots of fruits and veggies can be dried this way. 
     Of course we started by researching Drying Zucchini in the Oven, and found a great article over at Real Food Mama that describes the process in clear and simple steps. Here is what we did with her info.

Oven Dried Zucchini

  1. We started by washing and drying our zucchini. We had 3 and a half large zucchinis we started out with. (I completely forgot to get photos of us washing, cutting and preparing our zucchini. :/ )
  2. Cut into 1/4 in slices. Any smaller than that, and it will dry too quickly. Any thicker, it might take too long. We did end up with some larger and smaller slices. My daughter (and I have to admit, myself as well) ended up making all sorts of sizes of slices by hand. This wold probably be easier with a veggie slicer of some sort. It is now on my wish list to get one. 
  3. Place slices on a cookie sheet in a single layer. Place in oven. 
  4. Set your oven to the lowest possible setting. My oven's lowest is 150 degrees. You are drying them, NOT cooking them! Think 'Low and Slow' while they are drying. Also, air flow is key in drying foods in your oven. I propped my oven open with a knife set on its edges in the door. You might have a better option and I would love to hear it if you do! 
  5. You must flip them over quite often to insure even drying on both sides and to prevent them from sticking to the cookie sheet. I figured this out the hard way. My second batch the next day dried a lot quicker since we sliced them all at the same time. I stored them in the fridge overnight and this might have caused them to dry a bit while they were in there. 
    This is what the look like as they
    are drying when you flip them.
    Ooops!
  6. Dry your zucchini until they are no longer flexible. They will be crispy to touch. My first batch took 6 hours. The second batch took just 4 hours.

  7. Store your dried and cooled Zucchini in jars or baggies. Note a whole sheet of dried Zucchini did not fill up a pint jar. Extracting the water significantly reduces the size of the slice. Zucchini is 96% water. 
  8. Now what do you do with your dried zucchini? I hear it is good in soups and sauces. I have never tried them before and have never used them in cooking. (Right now, my daughter is preforming an experiment on re-hydrating a piece of our newly dried zucchini. I will let you know how that goes on another post.) I would actually like to try them in lasagna layers. We did try them just they way they are and we all kind of liked them. My last batch I seasoned them with a dill/onion seasoning packet I had up in my cabinet. They were yummy! But I tell you, a little seasoning goes a long way! 
Do you have a good recipe that uses dehydrated zucchini? We would love to hear about it! 

Wednesday, July 16, 2014

Wild Onions

 This post does not contain Affiliate Links. 

     One of our favorite wild foragables is wild onions. My family and I had a hard time NOT picking every wild onion we found on our property. If we had, we would not have any for next year. Wild onions go naturally in our yard. They are small, but they are very good! I have sauteed them as a side dish, added them chopped in soups and stews, but our favorite use for them is adding about 1/2 cup of sauteed onions to our meat loaf mixture. Now mind you, they are tiny and it is a bit of work, but so worth it! I am not a big fan of onions, but these I love! 

Benefits of adding onions to your diet:
(all onions, not just wild ones)
  • Increases your immunity
  • Regulates blood sugar
  • Helps fight cancer
  • Heart Healthy
  • Helps prevent ulcers
  • Helps with cataracts
  • Fights the growth of tumors
  • Strengthens the arteries
  • Helps to combat disease
   
   Here is some more information I have found on wild onions from Merriweather's Foraging Texas. This site is my 'Go To' site for wild foraging. If you are interested in wild foraging, especially in Texas, you will enjoy his site! (Highlighted pink information was taken directly from the above mentioned site.)

Onion - Wild

Scientific name: Allium species
Abundance: plentiful
What: bulbs and young stems/leaves
How: raw or cooked as seasoning
Where: open, sunny areas
When: all year, more common in cool weather.
Nutritional Values: Vitamin C plus small amounts of other vitamins, minerals, some carbohydrates.
Other Uses: juice acts as a weak insect repellent
Dangers: Toxic "Crows Poison" plants look just like wild onion but only wild onion smells like onion. If it smells like onion it is safe to eat, if it just smells like grass it is toxic Crow's Poison (Nothoscordum bivalve).

     There are also a poisonous plant that looks just like them called 'Crow's Poison.' Crow's Poison grows right along with it. We found several of the poisonous kind. We have noticed they smell like grass vs the lovely onion smell. They also seem rounder than wild onions. Even my 10 yr old could tell the difference. We are not too concerned with mistaking them for wild onions. Not only are they easy to spot, you would also have to eat quite a lot to feel the effects of the poison, which might be a slight stomach ache. 
Wild Onions Growing In My Yard Early Spring
     As with all wild foraging, do not take all of the plants you find. If you do, there might not be any for next year. Take a few from each cluster and leave the rest, pulling from a multitude of spots. We found a large area on our property and have named it the 'Wild Onion Patch.' It will be left alone until next year. They seem easier to find in the early spring time where I live. 

Update:
Spent Thanksgiving with my family. Why they were all inside, visiting, guess what Zoey and my nephew were doing? Foraging for wild onions! She taught him how to identify them by smell and looks. :)


We will be adding these to our meat loaf this week!


Disclosure: I am Amazon Affiliate and may receive a small compensation for including links on my blog. Buying through my links is not necessary, just appreciated. Amazon does not charge extra for linked items recommended by their affiliates.  I only recommend products that I use and trust OR plan on using in the future. Please buy responsibly and do your own product research before buying anything online.