Enter your email address:

Delivered by FeedBurner

Homeschooling The Well Prepared Child: life skills
Showing posts with label life skills. Show all posts

Saturday, October 11, 2014

We Butcher A Chicken...

WARNING- This post contains photos of a family sending their own chicken to freezer camp! If you are not the chicken killing type, or if you are disturbed by information or images of animals being butchered, please, DO NOT READ THIS POST. We are on the path to self sufficiency, and raising our own food is part of this journey.


"We butchered a chicken today. Great life lesson and anatomy lesson. There is something... satisfying... to be able to provide a meal for your family that you know what it was fed, you know how it was treated, you know how it was butchered, and you know how it was prepared. I don't know if we will ever do another, but, we are happy with today." -Personal Facebook Post February, 2014

     We have become a society disconnected with our food. Rarely does anyone know where or how their food is processed. We buy our meat in nice, little wrapped packages, and not once do we question where it came from. How were they raised and in what conditions? What were they fed? How was it processed? The chicken from the stores is kept in giant barns crammed full of thousands of chickens, all pecking at each other, or standing there waiting to die. Don't believe me? Type in your computer, 'what are chickens fed to make them grow so fast?' and see what comes up. Quick link to Wikipedia says, well it says a lot.. Just read for yourself.
     I am in no way condemning anyone for eating supermarket chicken. I buy it all of the time still. My family loves chicken and I am not a lover of butchering my own meals. Honestly, I hope to grow out of this.  I have already come quite a ways from the girl I used to be. In the past, if it did not come from the supermarket, wrapped up nice and neat in Styrofoam and plastic wrap, I wouldn't eat it. We were given some hamburger from my uncle one time and while my family raved about how wonderful my meatloaf was, I was in the bathroom gagging and hearing Uncle Mark call out 'Calfy' to his cow. Fresh eggs? FORGET ABOUT IT! That was just disgusting! (My sister is still this way!)  In my quest for self sufficiency, however, I have grown to realize the importance of knowing where my food comes from. This is not important to everyone, but it is important to me.
      My husband's, mother's, boyfriend's. granddaughter (phew, did you catch all that?) raised chickens for FFA. When the project was finished, we were asked if we wanted them. They are Cornish Rock Cross and are breed to grow quickly. This also makes them unlikely to ever mate, lay eggs, or live past a certain age. And while I was not yet 'there' in my homesteading journey, I felt if I was going to 'Talk the talk...' I had better start down this road when I was offered the chance at no cost to me.
     My daughter helped me along on our first journey. We researched, read articles and watched youtube videos on butchering chickens. We decided to go with the 'cone method' of butchering. We took a milk jug, just like on the video we watched, and cut out the bottom of it. Then you put the chickens head through the hole and slit its throat. As it drains of blood it goes peacefully to sleep. Or rather, that's what is supposed to happen. Nothing could prepare us for our first time. Like I always seem to say, you think you know, but it never turns out how you expected. The chicken fought going into the milk jug hole, the incision clotted up instantly, then, the chicken cluck/cussed us, saying we were doing it wrong. Hubby came to the rescue with an ax. Note to self: Never, ever try that method again.
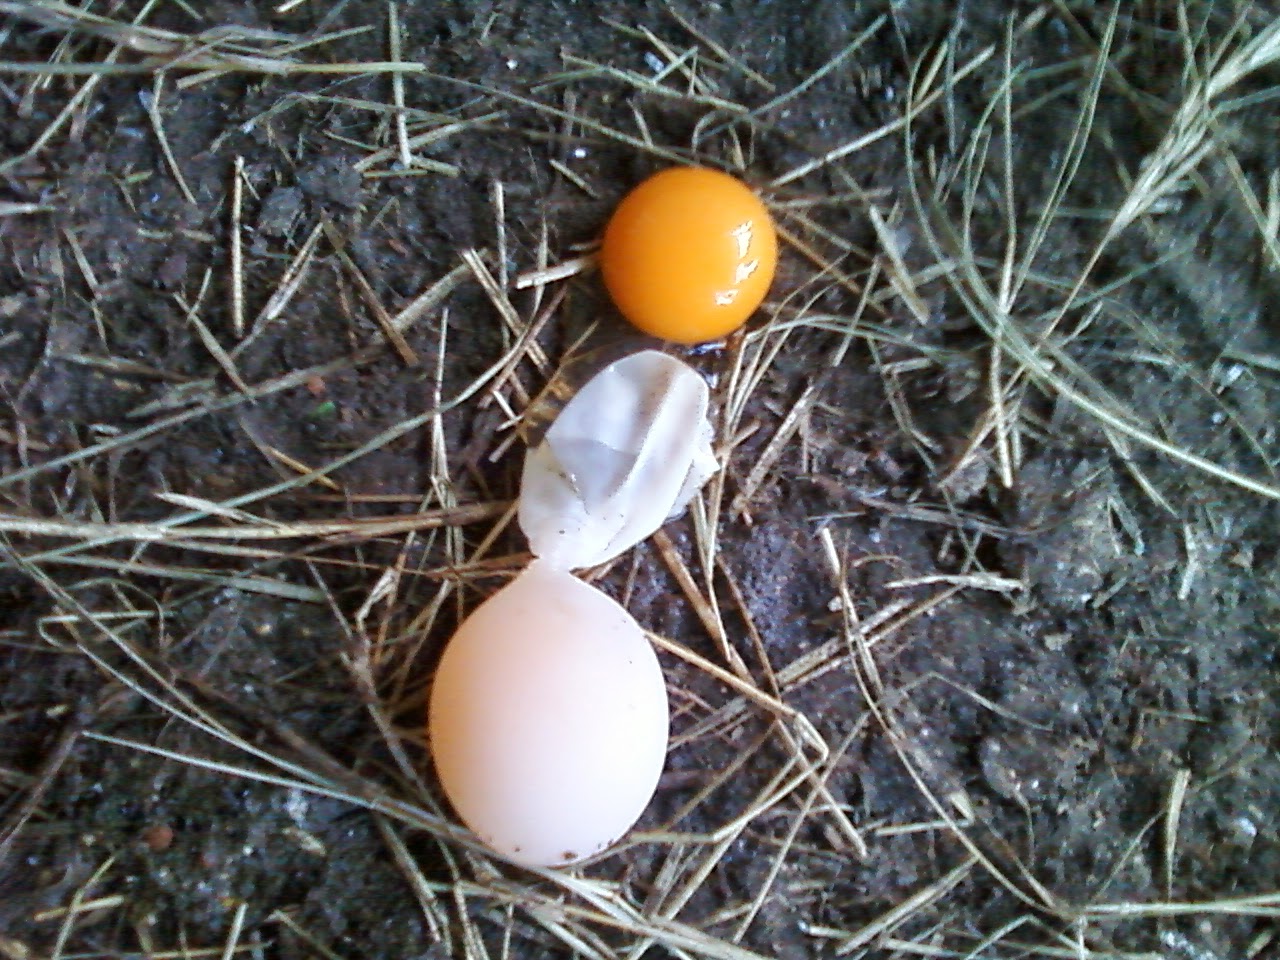
     Plucking took nearly and hour, even with dunking in the hot water several times. We have since learned that the skin is not that important to us, even when frying. It is a lot quicker to skin. We do not eat anything on the inside, so it is all boiled and fed to my dogs. We did find a lot of little orange balls we discovered were the beginning yolks of eggs. That is how we ended up keeping 'Prissy,' our first hen to lay an egg.
     It was very educational for my daughter. She learned a lot about chicken anatomy. She is like me (not crazy about killing the chicken) but she loves to identify the organs. She loves to cook our homegrown meat as well. She has very little attachment to the chickens because we have told her from the beginning these were 'food, not friends.' My hope for her is to become a veterinarian or be in another medical field. I believe she will be great healer one day.
     Just in case you continued to read, but were uncertain if you wanted to see the photos, I have saved them for last. The are not really terribly awful in my opinion, but this is your last chance to go check out one of my other articles. You can see my daughter make store bought Cornish Hens in my post HERE. Again, you are reading a blog about our homeschooling/homesteading family's quest to become more self sufficient. Thank you for your support.


Our FAIL...
 Getting the insides out.


 Don't you just love her protective gear!
An hour to pluck it and it still looked like this?
 The end result. 
     We decided to stuff and slow roast our chicken. We learned from our Cornish Hen dinner that we like seasonings, and this time we did it right. It was delicious and tender. I had forgotten to take a photo of it when we were finished cooking it. The photo above is what we had LEFT after dinner. Two adults and a 10 year old barely made a dent. I pulled off the rest of the meat and separated it into family sized portion freezer bags. We got 4 more meals out of this one bird. 5 meals for free. 

     We have sent several chickens to 'Freezer Camp' and I plan on sending more soon. If this is not your cup of tea, I understand. I used to be that girl remember? But it is now something I take pride in. My meat was raised by me. They were fed a healthy diet twice a day and also free range all day long. I know how they were treated, I know how they are processed. I know they were healthy and will provide a healthy meal for my family. Thank you for joining me on my journey.

Wednesday, June 25, 2014

The FFA Hens

This post does not contain Affiliate Links.
   
     Finally got a few photos (that are a little better) of my FFA hens. Their names are 'Prissy' and 'HeShe.' Funny story, I was writing this post to see what everyone thought about the chicken 'HeShe.' Then we had some strange developments and I am pretty sure we have our answer now.
     We have actually had this chicken for several months now. It always seemed a little off, but we never questioned if it was really a hen, until a little over a month ago. 'HeShe' has always been an ugly chicken. Her face just looked mean and grouchy. She has a gimp leg that turns in a little, and she does not like to walk, run, or stand for very long. Her feathers never really laid down nicely, and at first we thought she might have been our Roo's favorite, (hint, hint, wink, wink) because she always looked harassed. Then suddenly, Roo stopped messing with her. Completely! He turned all of his attention on our Prissy Hen, causing a huge tear under her wing. Now I am going to skip over to talk about the eggs we have been getting. But first, check out the difference between Prissy and HeSHe.
HeSHe

Prissy and HeShe


At this point, we as a family have wondered, 
"Why is HeShe looking so much like a rooster?" 

That's when we named her 'HeShe.'

     Okay, now back to the eggs! HeShe couldn't be a rooster, we were getting way too many eggs for just Prissy to be laying them. One day we had 2 perfect little hard shells and 3 rubber eggs. The hard shells were laid in the nesting box, while the rubber eggs were scattered all over the hen house. We had seen Prissy use the nesting box, so we were confident she was the one laying the perfect little eggs. So who was laying the other, rubber eggs if not HeShe? 


      We were happy with the eggs we were getting and we were getting a lot of eggs for just 2 little hens. I figured HeShe would eventually get the hang of it and start laying normally. After all, these were extras from an FFA Meat/Show group of chickens. I was told they would never lay, never mate, never be good for anything except for meat. Also, they were prone to suddenly freak out, fly up in flapping wings of fury style and just die. I added egg shells and oyster shells to their diet in hopes this would help. 

     We started with 7 chickens. 6 hens and one rooster. Our Roo was glorious. We knew which one was the rooster from the beginning. Within a month after getting him he started to crow in the morning. He stood tall and proud, showing us his 'cock walk' often. We loved him. 

     But as rooster do, he mated constantly with our hen, Prissy. To the point he was hurting her. Not his fault. I had researched you needed a minimum of 6 hens to keep a rooster happy. At the time, however, these were just meat chickens I was to butcher for our meat. They were not supposed to lay eggs, or try to mate, or live past 3-4 months. Our other chickens were not old enough to put into the big coop with these chickens. So poor Prissy was 'harassed' on a regular basis. To the point she was ripped under her wing so bad I was sure we were going to have to cull her. Roo might have made it past this point, if it was not for the fact he started to attack my brother in law (super funny) and my 18 yr old son (still funny.) But, when he started attacking my 10 yr old daughter, that is when we decided Roo would have to go to freezer camp. It was a sad day for my daughter and I. Even though he was attacking her, we still loved him. But we knew, this was not a petting zoo, these were not supposed to be pets, this was food for our family. 
RIP my Roo! 

     Now we still had the problem of HeShe. Is it a boy or a girl? Her body was all hen. Big, fat, plump hen! She is short, she walks a bit funny, but definitely like a hen. My daughter wants me to also add Prissy and HeSHe both come running to the hen house like a couple of airplanes trying to take off. :) Roo did not run the same way. HeShe's comb and waddles were getting longer and darker, and looked more like Roo. Her feathers around her neck were becoming longer and wispier looking like a rooster. Slowly her tail feathers started to part and look fluffier. What was going on? OH! and right before Roo was sent to 'freezer camp' they had a scuffle only seen out of the corner of our eyes, 'Did HeShe just try to mate with Prissy? Is that why Roo attacked?' WHAT IS GOING ON HERE????

So tell me, is this a hen or a rooster? 
     And why would it have taken MONTHS for him to even look like a rooster? MONTHS! He started out just not being as pretty as our other hens, then grumpy looking. Then in came extra comb and waddles. Lastly, the feather change... So is this a hen or a rooster? I have showed HeShe's picture on a chicken group I am in on Facebook. Consensus was it was a hen that just had more male qualities. But I still wonder.. At least I did wonder. The morning after Roo's demise, I walked out, saddened by the fact that my Roo would not great me with his morning crow, only to be greeted by the morning crow of HeShe! (Now named Frankie) Has anyone ever had this happen? Has anyone ever heard of a FAKER chicken? 

     Now we have had to remove 'Frankie' from the rest of the flock to allow Prissy time to heal and let the younger chickens get used to the coop. We are not sure what we are going to do. I think he will meet the same fate of Roo, because we are pretty sure our new chicks have a boy or 2 in the flock. These will be a nicer breed of laying hens. It kinda makes Frankie useless except to be dinner. That was the whole reason we got them.  Prissy will be the last surviving FFA hen soon. I just hope she keeps laying the big beautiful eggs she has been laying, (and I secretly hope Frankie lays an egg in his pen, rubber or not, so he can stay too.) 


 Our laying chickens! 


Prissy is not sure what to think of the newbies in her house! 


Disclosure: I am Amazon Affiliate and may receive a small compensation for including links on my blog. Buying through my links is not necessary, just appreciated. Amazon does not charge extra for linked items recommended by their affiliates.  I only recommend products that I use and trust OR plan on using in the future. Please buy responsibly and do your own product research before buying anything online. 

Thursday, June 19, 2014

Cooking Lesson Turned Anatomy Lesson

This post contains Affiliate Links.

     
Completely unexpected! 

     My daughter had been bugging me to make "little turkeys" (Cornish Hens) for a while now. I figured, why not? She needs to know what a real chicken looks like whole. Thought this could be the first step in learning to cut up a full sized chicken. 


     Yes, of course we made the little hens dance. :) 


     Zoey prepared them by covering them up with a whole lot of butter. Then, we covered them in foil and cooked our hens to perfection. She gobbled it all up! (No pun intended) The whole time she was eating, she was also asking questions about the different parts of the hens. Through out the whole entire meal! She found the breast bone with the cartilage and the bone attached together and gave me a crazy look. I explained the soft wiggly stuff was cartilage, just like on the tip of her nose and the roundness of her ears. She felt the bone part of her nose and how it came down to the softer part. For a moment, she looked very thoughtful. Then she said, "Hmmm... so that's why skeletons don't have ears!" 


Real life, hands on learning at it's best!     


Do you cook with your kids? We would love to hear

about your favorite kid friendly meals! 


Disclosure: I am Amazon Affiliate and may receive a small compensation for including links on my blog. Buying through my links is not necessary, just appreciated. Amazon does not charge extra for linked items recommended by their affiliates.  I only recommend products that I use and trust OR plan on using in the future. Please buy responsibly and do your own product research before buying anything online. 

Wednesday, June 18, 2014

YOU ATE A WHAT?

    This post contains no Affiliate Links. 


    As soon as I would tell someone, they would immediately make the sour pucker face, shake all over like a seizure and turn green. Some ran away screaming in fright. So of course I would have to tell them again, "We ate snake last night!" Same reaction, kinda funny. "You ate a what?" "Yes, we ate a snake." Complete and total freak out! Got to love it!
     Yes, we ate a snake. Yes, it was good. Yes, we will probably eat another if we can catch one again. "Who killed it?'
"My husband."
"Did you skin and gut it?"
"No, my son did. I didn't even realize what was going on till he brought it to me and asked how he could cook it."
"But, you ate it?"
"Well, yes of course I did!"
(Insert retching/gagging sound here!)

     Truth be told, we as a family, have wanted to try snake for a while. That is what happens when your son is a survival show junkie. Since he was old enough to watch t.v. he loved animal documentaries and shows. His teachers would comment on how he was the only one that would watch a documentary when they were studying certain animals. He was glued! When shows like "Survivor Man' started popping up everywhere, he was hooked. What boy in the country wouldn't be? Now that he is older, he has boasted his adventures through the woods and down the creek. (Where he should not have been cause it was forbidden. Can't be mad, cause at his age, that is where I would have been as well!) Many a time has he asked me, "Mom, if i find a snake, will you cook it for me?" "Well, yes, as long as you don't mess with it and show us the snake first so we can make sure it is not venomous" "What if I get a squirrel?" "You skin and gut it, I'll cook it!" Since that day he has watched his shows, dreamed of being a survivalist, and kept a look out for snakes and other critters he could eat.
     Once, son and daughter brought me a tiny, thin snake. Rescued from the cat a moment too late, its head was the only thing damaged. "Mom! Let's cook it!" It looked way too small. "If you can skin and gut it, I will cook it!" Several frustrating minutes went by. Not a very easy clean nor a whole lot of meat from the wiggling dead snake. Their faces were priceless. The cat was happy to get his prize back.
    So when your 17 year old son, who has waited YEARS to try snake, comes in with it skinned and gutted perfectly and says, "Mom, show me how to cook it!" Well then, that's just what you do!
     A small fire was made on the grill. He seasoned it with some garlic salt. (Everything tastes good with garlic salt, right?) My son patiently flipped his snake until it appeared to be finished cooking. When he tried it, he was not impressed. "It doesn't really taste like anything. Can you cook it like you cook garlic chicken in the pan?" In went some butter and garlic into the cast iron. 15 minutes later we were gathered around the kitchen counter, devouring a snake and pulling the delicate meat from around the tiny bones!
I'm glad my son finally got to try snake, and also, that he was not disappointed! 

     Yes, we ate snake. Yes, we liked it. AND YES, we will do it again if we get a chance!

DISCLAIMER FOR ALL OF YOU FREAKING OUT CAUSE SNAKES ARE WONDERFUL FOR THE ECOSYSTEM: I agree! And if the snake had not been in a fight with my dog at the time, he might have been able to go along his merry way. My husband did not know if it was venomous or not. Nor did he care at the time. This death did serve a purpose, we ate the flesh for dinner, chickens and dogs ate the insides and my daughter preserved the skin! Waste not, Want not! 


Disclosure: This post contains no affiliate links, However, I am Amazon Affiliate and may receive a small compensation for including links on my blog. Buying through my links is not necessary, just appreciated. Amazon does not charge extra for linked items recommended by their affiliates.  I only recommend products that I use and trust OR plan on using in the future. Please buy responsibly and do your own product research before buying anything online.

Monday, June 16, 2014

Don't be a ROTTEN Egg!

 This post contains affiliate links.

    Recently, the son and I went to a small 'Mom and Pop' country store down the road from my mom's house. I had forgot to get eggs and they were selling fresh eggs from the owners own chickens. My daughter was not with us and she looked at the eggs with an odd look and said, 'How do we know they are really fresh?' Well now, that is a good question! And, a pretty good lesson for the day! (And honestly, I was a little leery buying fresh eggs from someone I did not know!)

Photo from Gail Damerow's book Storey's Guide To Raising Chickens

    I remembered this post I saw on Facebook a little while back and I (very smart like) remembered to save the photo! The Chicken Chick let me know who to give the credit to. Gail Damerow's book Storey's Guide To Raising Chickens contains this excellent picture graphic to let you know how to tell if an egg is fresh or not. Of course we had to try! (And the book is now on my Wish List!)

     The eggs sunk like a ton of bricks and landed flat on the bottom! We cheered every egg we sunk! Fresh indeed! And at $2 a dozen for super large eggs, it was quite a steal. This activity was simple and yet it is another important skill every 'Well Prepared' child should know. You never know if you will have to barter or trade or buy from someone and want to make sure what they are selling you is fresh! (Can't wait to try on some eggs from the local 'big box' store!) 

UPDATE: My mom called to tell me a funny story. While Zoey was at her house, she wanted to eat eggs for breakfast, but my mom didn't know how fresh they were. My daughter told her, "Hold on Grandma, let me show you how to tell!" She got out a bowl of water to test the eggs freshness. THEY ALL FLOATED! She turned to her grandmother and said, "Grandma! How long have you had these?" Haha! 


Disclosure: I am Amazon Affiliate and may receive a small compensation for including links on my blog. Buying through my links is not necessary, just appreciated. Amazon does not charge extra for linked items recommended by their affiliates.  I only recommend products that I use and trust OR plan on using in the future. Please buy responsibly and do your own product research before buying anything online. 

Sunday, June 15, 2014

Cooking On the Wood Burning Stove

   This post contains Affiliate Links.


      When you are raising a well prepared child it is essential they know how to cook for themselves on a variety of cooking sources. One of our favorite winter activities is cooking on the wood burning stove.

     Taco meat on the stove was our actual inspiration for doing the Tuna Can Burner Experiment. To get the meat to cook, we had to get the fire nice and HOT! It had been cold all that afternoon, but by the time we started cooking, we were sweating by the fire. We brainstormed ideas on how to cook with out having to have a super hot fire. Our electricity goes out more in the summer than in the winter. 

     My daughter's wood burning stove specialty is 'Chicken Fajita Soup.' It is a recipe I came up with and she perfected. This is a great cold weather recipe. It is simple and easy. 


Chicken Fajita Soup

1 Can of Corn
1 large Can of Petite Diced Tomatoes
2-3 Large Chicken Breasts Boiled and Shredded to bite size pieces
1 Large Onion sauteed till tender
4 slices of American Cheese or a 1 in block of Velveeta
(The affiliate links listed above are for example only. The prices at your local store are much better than the ones I found on Amazon.)

Open all cans and pour directly in to a large pot. Do not drain the cans! Add remaining ingredients. Use the Ranch Style Bean cans to fill with water and pour into the pot as well. Let simmer for 10-20 Minutes. 
Top with shredded cheddar cheese, fresh diced tomatoes, sour cream, onions, and/or tortilla chips. 


YUM!!

For info on the benefits of cooking with kids, please visit these websites...


Disclosure: I am Amazon Affiliate and may receive a small compensation for including links on my blog. Buying through my links is not necessary, just appreciated. Amazon does not charge extra for linked items recommended by their affiliates.  I only recommend products that I use and trust OR plan on using in the future. Please buy responsibly and do your own product research before buying anything online. 

Saturday, June 14, 2014

Water Filtration

     This post contains affiliate links. 


     Every Survivalist/Prepper should know how to filter out muddy water to be drinkable! My daughter wanted to see if she could take water from the mud puddle and filter it. First we youtubed some videos and researched 'Water Filtration For Kids' and found lots of good info.  Then she went outside and got water from the mud puddle she had splashed in all day. This is what it looked like:


     Not a very pretty sight! I asked my daughter what she thought we should do next. She wanted to see what it would look like if we waited. Her theory was if our soil samples from the Soil Sample Project settled and cleared the water a little, than maybe the same thing would happen if we left the muddy water sit for a little while. So we waited. 


      After just one hour it settled quite a bit, but, we wanted to see if it would clear up on its own if we let it sit overnight.

     It did not completely clear. She saw a slight separation in the jar about mid way.  I asked her what she wanted to do next, and she decided to wait. 

      In 48 hours the super fine dirt had settled in the bottom of the jar on top of the other dirt. At this time, my daughter got out her science journal and documented what she observed. We decided we would wait to see what would happen next. Unfortunately, we had to make a sudden trip out of town and had to leave our project where it sat in the bathroom window.  My daughter had worried about her project the whole time, 'Momma, it was already starting to get green!' We came back 2 days later to this...


And that really does not look to bad until we got close up and really looked... 

 You really can't tell by this photo, but the film actually looked... FLUFFY....

and what the heck was this? 

She decided to filter it anyways. 

The first filtration she tried was to pour 
the water through coffee filters alone. 

This is what was removed.


This is what she ended up with. Not too bad! :)

     She looked at me and said, 'But can we drink it?' I didn't know! But I highly doubted it! So back to Google we went to do some research. We found out you need something to kill out the tiny micro organisms and bacteria that might be living in it. We decided to try the rock, sand, and activated charcoal method. She cut a 2 liter bottle in half and placed the top of the bottle upside down and into the lower half. Then she placed coffee filters into the bottom and layered the charcoal, rocks and sand. 


     It seemed the more we filtered it, the more yellow it became. The one on the left is our filtered water. The one on the right is water from our tap. HUGE difference in color. AND it smelled like pee! Why would it smell like pee? We consulted a group I am in on facebook and they asked what kind of charcoal we used. Well.... apparently all charcoals are not the same, and the charcoal we were supposed to use was activated charcoal, not Daddy's charcoal he makes us grilled pork chops with. Whoops! It was suggested we use bleach to kill out any microorganisms and bacteria. 

Now that is better! We did not try to drink it. The whole pee smell thing completely ruined it for us. (and honestly, I was not sure how safe it would be. Can't risk my baby's life in the pursuit of survival.) 

SIDE NOTES:   More research is being done to figure out how to be able to take puddle water and make it drinkable. That was the whole point in the first place! An observation my daughter made was we ended up with a fraction of the water we started with.  She was amazed at the amount of water that was lost in the process and came to the conclusion that the coffee filters soaked up too much of the water to be useful. Did you notice my daughter was not in the pictures doing the project? That is because she asked if she could 'document' the project on her own this time. :) My baby is a researcher and knows to document! 

Love this topic and want to see a little of what we researched? 


Preppedandprepared.com is no longer available, but you can still find PK on her own You Tube channel. 


Disclosure: I am Amazon Affiliate and may receive a small compensation for including links on my blog. Buying through my links is not necessary, just appreciated. Amazon does not charge extra for linked items recommended by their affiliates.  I only recommend products that I use and trust OR plan on using in the future. Please buy responsibly and do your own product research before buying anything online.