Our family teaches homesteading, DIY, survivalist skills, life skills as part of our homeschooling curriculum. Thank you for joining us on our journey to become more self sufficient!
I don't think my garden has ever been more important to our family. With Mike out of work, we are going to need all the help we can get. My husband's work would not clear him for 'light duty' like the doctor ordered. He does not go back to the doctor until the end of June. Even if he starts work the following Monday, it will still be mid July before we see a paycheck form his job. My paycheck usually goes to groceries, gas in my vehicle and any odds and ends I feel necessary. The less food I have to buy, the more of my paycheck that can go to paying the bills. So far we are doing okay. Thank goodness I prep! We have been using the food I have tucked away for a rainy day. Well, baby, right now it is pouring! ;) Only problem is, my family is more of a 'Fresh' fruit and veggie type of family. We don't eat a lot of process foods. When you prep, you buy a lot of foods that have a longer shelf life. Unfortunately, most of those are processed. Until the garden comes in, I am buying a lot of my 'fresh' items from the grocery store and some from a local produce stand. I can't wait till the garden is in full force! Biggest problem we have had is the rain. Good grief I wish some of it would save its self for this summer! By August, I'm sure we will be begging for this weather. For now, we are gardening in between thunderstorms and wading to the garden to get covered in mud. What we have managed to get in the ground is growing well. WE CAN"T WAIT!! Thought I would share a few pictures with you of the garden thus far.
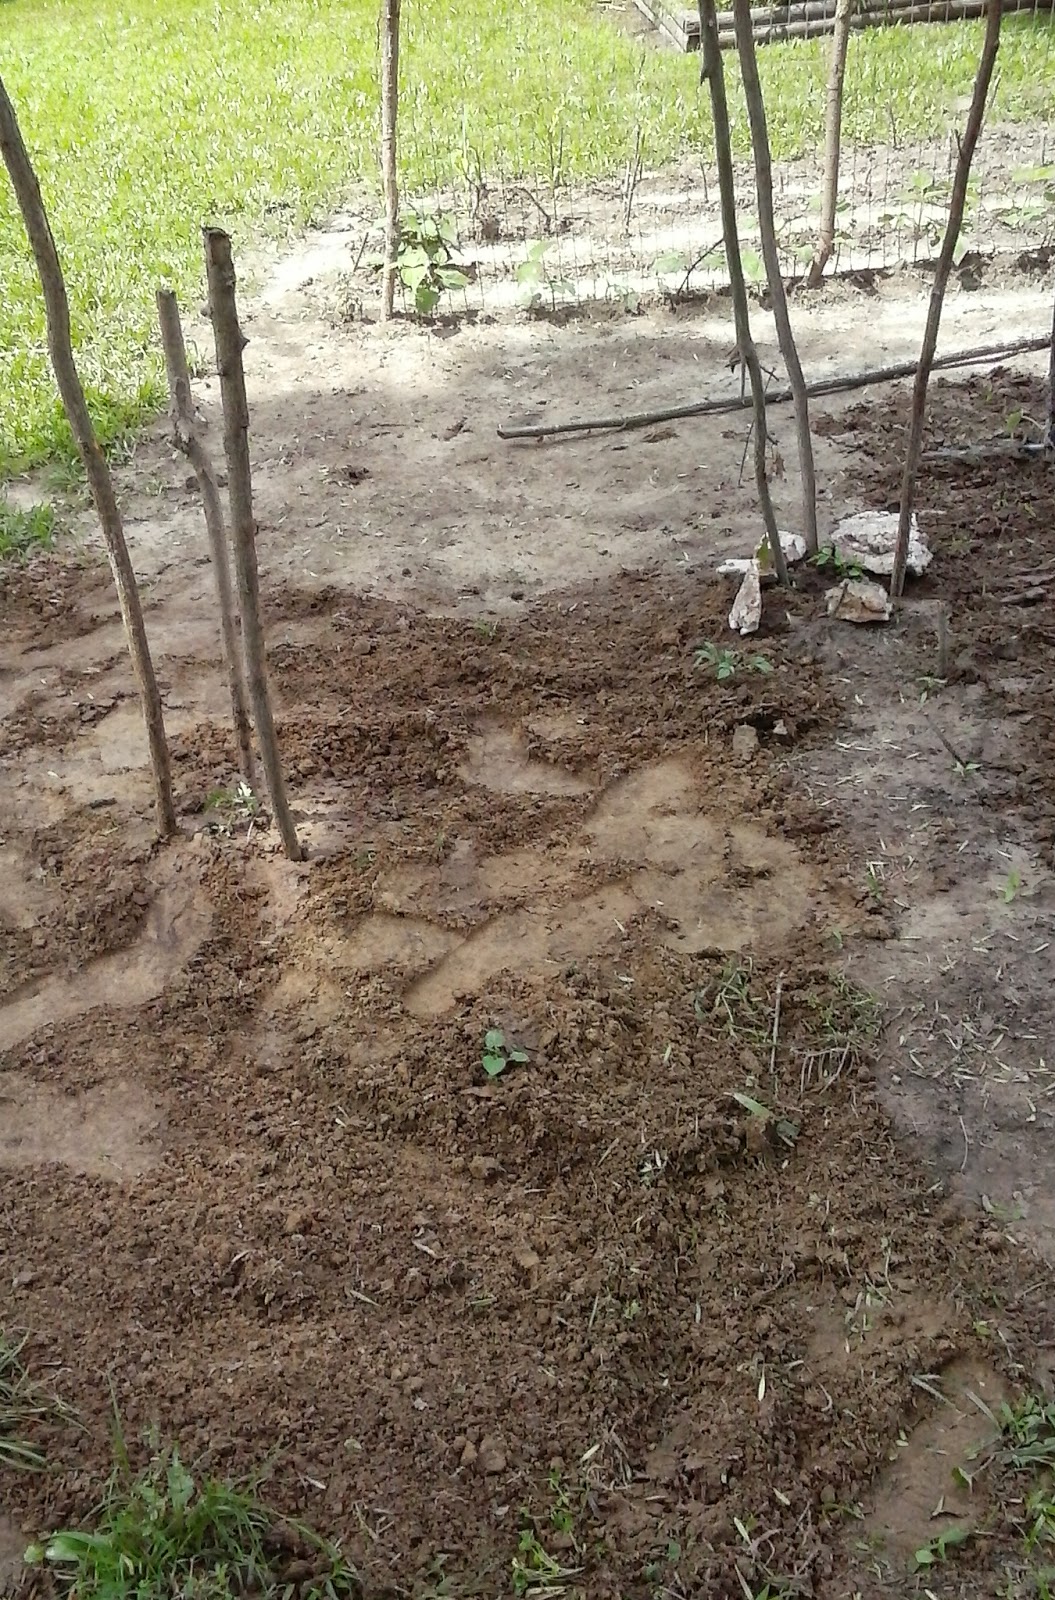
I saw mound gardening somewhere.. Thought it was a really cool idea. Just in case we can not weed fast enough, we can weed only the mounds and then use the weed eater to cut the grass around them. Crossing my fingers on this!
This was supposed to be full of potatoes, but a sink hole created by the way the yard is leveled and all of the rain took most of the dirt and the potatoes seed plant under ground and washed them away. I planted some tomato plants instead. Regular sized heirlooms and cherry tomatoes. We have no money for tomato cages, so I am hoping these cut saplings help to keep them under control and out of the dirt.
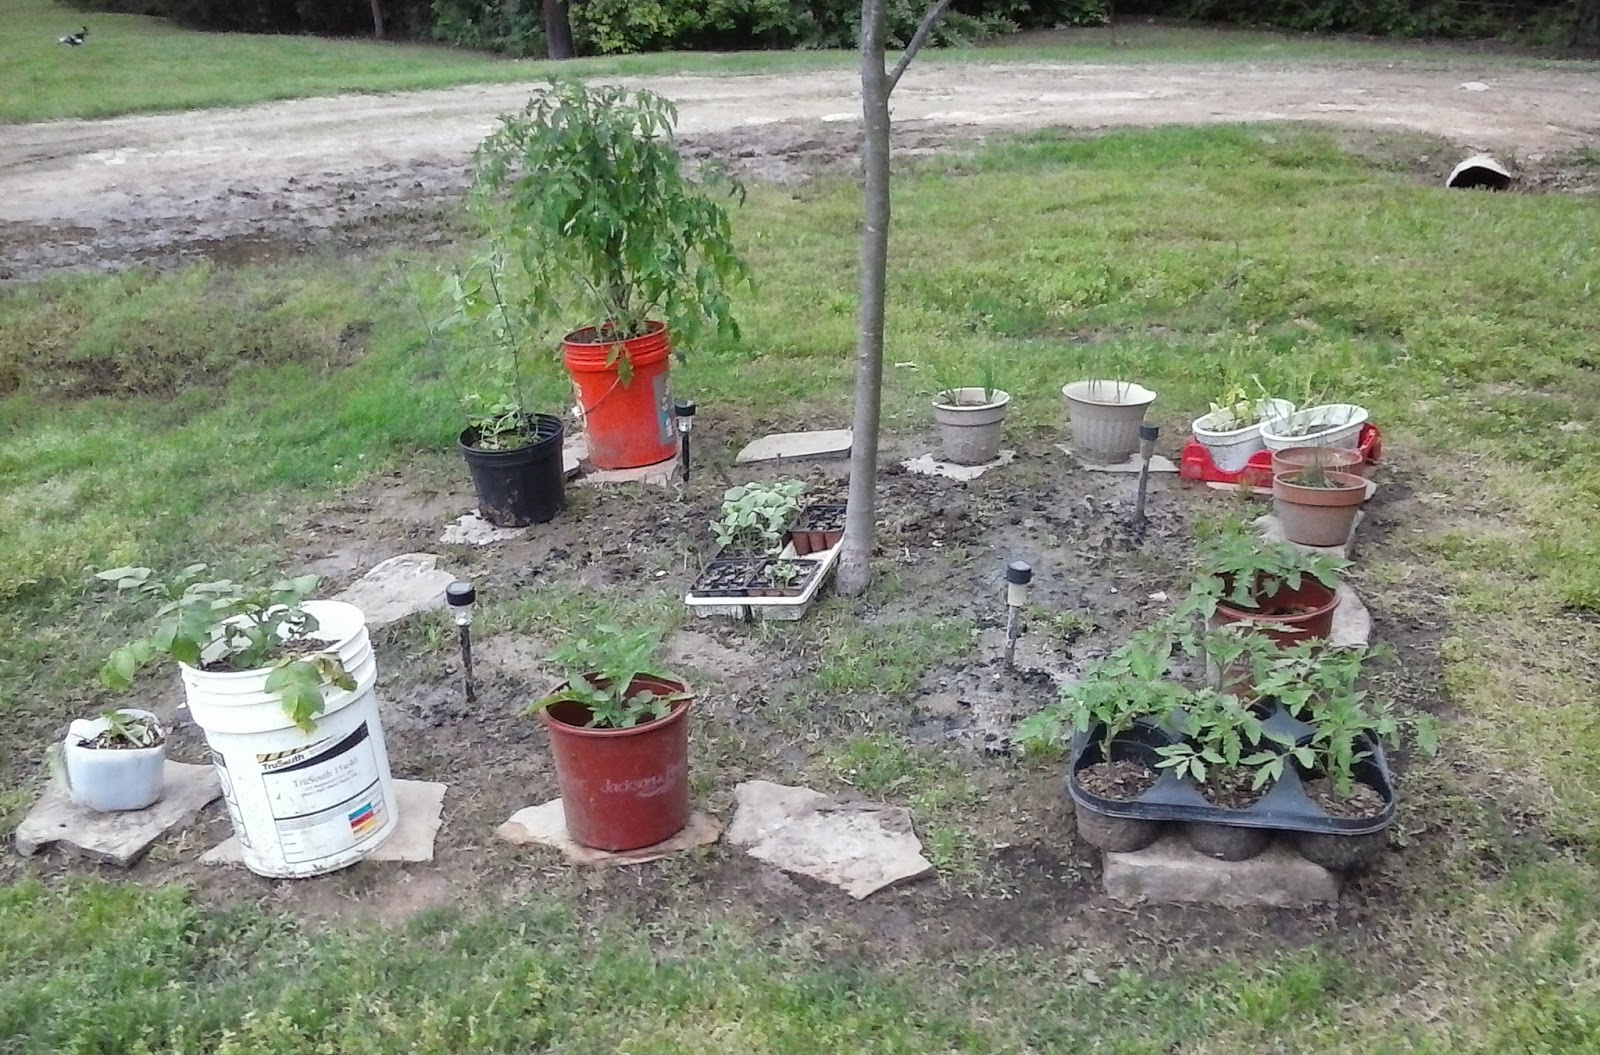
Most of the garden is shown here. It is only about 20x20 feet. On our land, it is mostly clay dirt and this is the best place to put it other than in the very front yard.
Our green beans and peas. In the background, what looks like tall grass is actually our corn growing. We never have much luck but we love corn on the cob and keep on trying.
So we planted some cherry tomatoes in here.. but they didn't grow. So Zoey planted some more. Then they ALL came up. Believe it or not.. this is AFTER I have already thinned them out into other parts of the garden and containers.
Last year we had lettuce, spinach and onions in here. This year I have cabbage and onions. We have almost eaten ALL of the onions already, I think will go get some more onion bulbs to plant. I like home grown onions a lot better than store bought.
Not sure about tire planting, but we had one and needed another container to plant in. I have heard good and bad things about using old tires.. We will see. More Cherry Tomatoes.
I have not grown cabbage in YEARS. My amazingly awesome neighbor gave me some plants a while back, so I thought, "Why not?" We do not eat a whole lot of cabbage but it looks like I will be selling the extras and looking for a whole lot of new cabbage recipes. For some reason, they remind me of Harry Potter...
Hard to tell here, but there are four tomato plants and a pumpkin plant here. If you look to the upper right, those are dandelions and other 'weeds' that my rabbits like to munch on. We let the weeds grow up on that side.
We had to put the bucket Cherry Tomato plant into the ground. It just did not look healthy. We have been getting lots of rain, but the soil always looked dry. Maybe too many drainage holes? I hope we did not kill it, beacause, it is LOADED with cherry tomatoes.
The new potato bucket is growing strong! At least I hope.. Sure looks pretty though.
Remember last year? This spot was covered with the 'Mystery Pumpkin' plant. This year we have two tomato plants. We still have 4 more that need to get in the ground. Not sure where I am putting them though.
So there you go. A little tour of our garden. I am really loving all the time spent as a family to help grow us food. Even my 'I hate gardening' teenager and my injured husband are pitching in! Does your family garden together? We <3 your comments!
Disclosure: I am Amazon Affiliate and may receive a small compensation for including links on my blog. Buying through my links is not necessary, just appreciated. Amazon does not charge extra for linked items recommended by their affiliates. I only recommend products that I use and trust OR plan on using in the future. Please buy responsibly and do your own product research before buying anything online.
It is that time of year again! Spring is my favorite time of year. All of the new plants and flowers coming up. The birds are returning. Days become longer and warmer. Everything is just green and sunny and perfect! Time to start our garden seeds! We started by going though our mess of a seed bag. All of our seeds we have been buying have been randomly thrown into a gallon size baggy and stored in the freezer. It was stuffed full of individual packets, (some new, some opened) and all of the random packs we created last fall when we harvested our own seeds. I did not realize how horrible this picture was until I tried to load it on here, but as you can see, we have many seeds. This is after we started to sort them. Then we made a list of all the plants we wanted to grow this year. The whole family got involved and created the list. When planning a garden, I have found it is better to grow what your family will eat. AND in quantities that will be easily eaten or preserved. One year I had 10 zucchini plants. My husband will not eat it and the kids only in moderation. After a few weeks, kids were tired of it and I had no way to preserve it. Most of it was wasted, (thinking I could do something with it, but never getting around to figuring out what) or given away. Then, last year I only got a few tomato plants to grow. When we ran out of tomatoes, which was often, my amazingly awesome neighbor Bree kept us supplied with her juicy mators as much as she could. There was never enough. Better to sit down as a family and decide what and how much needs to be grown. Okay, back on topic! Now that we had our list, Zoey and I selected the seeds we wanted from our sorted pile on our table. Then they sat there... till we got out of the hospital after my husband's accident. Wouldn't you know it.. I forgot to get pictures of us starting our seeds! We mixed in some of our composted wood dirt with some of our garden dirt, potting soil we had left from last year, and the oven baked egg shells I make to feed back to our chickens. We placed the mixture into the 9 pack containers (kinda like THESE) some plants came in and I saved from a few years ago. Pickling cucumbers, regular cucumbers, watermelon, cantaloupe, jalapenos, and bell peppers were started in these trays. We already had started tomato plants, a new bucket of potatoes (white bucket), sugar snap peas, and onions.
Do you see the orange bucket with the big tomato plant in the back? That is my tomato plant I have been babying all winter! It grew but never produced any flowers until I got it out into the sun. I feel like I am WAY ahead of the curve on tomatoes! :D Only, guess what? It is not a regular tomato plant. It was a volunteer plant I got from my Amazingly Awesome Neighbor, Bree. It came up on the side of her grandma's house. She gave it to me, I grew it all winter.. and it is a CHERRY tomato plant. Kind of bummed about that. Thought we would be making salsa soon. On the bright side of things, at least my salads will be yummier soon. Just look at my cherry tomatoes already growing!
In the mean time, my son, Alex, tilled the garden. My husband did it last year, but since the accident, there was no way he could do it this year. My tiller is old and is a beast of a machine. I suppose if I had to run the machine myself, I could. But, with a big strong teenager around, why would I. ;) Have you started your garden this year?
Disclosure: I am Amazon Affiliate and may receive a small compensation for including links on my blog. Buying through my links is not necessary, just appreciated. Amazon does not charge extra for linked items recommended by their affiliates. I only recommend products that I use and trust OR plan on using in the future. Please buy responsibly and do your own product research before buying anything online.
Yes, I said, "FAIL." But I am not sure of the reason why. One day my potato plant is growing like a weed. The next it is dying off rapidly.
From this... To this...
In just a matter of days.
So what happened? Like I said, I am not sure. However, I have some suspicions.. The day after I took the first picture, we had some very lovely overcast 70 degree weather. Of course I put my bucket outside so make sure it got some sun, and not just the light from the garage. It was only out for a few hours, but I might have shocked it. THEN, after I brought it inside, I used some left of fertilized water that I was using for my other plants. Maybe the combo of the outside time, and the shock of fertilized water? After it started dying, we continued to keep it indoors in it's usual home and water it. We were hoping it would get over it's shock and continue to grow. After a month, there was still nothing... Time to dump the bucket and look to see what happened.
Nothing but some potato shells, unidentified seedlings, and a new wormie friend. FAIL! I don't think it is a 'Bucket In The Garage' fail, but a simple Human Error Fail. Another Ooops! We refuse to be discouraged. We still have a box of red potatoes trying to grow under the kitchen counter. We started over on our Potato Bucket Experiment. This time, it will be left outside as much as possible. We are scheduled for some beautiful 70 degree weather by this weekend and the nice weather should stay until the end of this month. Then another cold spell is expected. We can't wait to start our outdoor garden. I guess prepping the garden area and starting some seeds indoors will have to curb our Spring Fever for now! I have also been looking into buying a Survival Seed Vault like this one, instead of or in addition to this smaller one I have been eyeing! I really like them both.
Will you be growing a garden this year?
We love your comments!
Disclosure: I am Amazon Affiliate and may receive a small compensation for including links on my blog. Buying through my links is not necessary, just appreciated. Amazon does not charge extra for linked items recommended by their affiliates. I only recommend products that I use and trust OR plan on using in the future. Please buy responsibly and do your own product research before buying anything online.
You know that amazingly awesome neighbor I have? Well, last summer, we helped her pull up her red potatoes and harvest them. When we were finished, she sent us home with a big box of home-grown red potatoes. We ate most of them but there were a few little ones that I stored under the cabinet in the kitchen. As you can see by the photo, they are crazy covered in eyes! So we thought, why wait for spring? Why not try planting them in a 5 gallon bucket now? Zoey got on the computer and googled 'How to grow potatoes in a 5 gallon bucket.' She found an awesome site called Five Gallon Ideas.com. There was a lot of great information on this site. We made notes in her Scientific Discoveries Notebook as we read and watched the videos. We are going to do more research later on and add that to her notebook as well. The hubby brought us in a bucket from the shed and I drilled holes in it while Zoey looked at me terrified. No, I am not as quick and efficient as Daddy, but I got it done by myself by golly! She insists Daddy needs to help next time. I told her we didn't need a man for anything. She just shook her head and laughed at me.
Above, you can see her Scientific Discoveries Notebook and our computer. Also in the background is the radish we picked from the garden today. We washed it up and added it to our dinner salad. We even added the stems and leaves. Did you know radishes leaves are more nutritious than the radish it's self? They have a little kick to them, and need to be ate a little younger than what we picked it at. Some of the leaves were a bit of a tougher texture than we like in our salad. We like the flavor though and radishes are super easy to grow.
Finally, we went outside. There is a spot in our front yard where we put fresh tree mulch, many many years ago. It has broke down into a very good growing medium. Zoey put the composted mulch into the bucket about 3 inches deep. Then she placed 4 of the potatoes she chose into the bucket and just barely covered the pototoes with more soil.
When tops start to form and peek out, we will cover them up with a little more soil, repeating until the bucket is full. We talked about the 5 elements that plants need and decided with this project the sun would not be needed since we will be covering the tops as it grows. We did place the bucket closer to the stove than the window in our garage. We think the warmth of the fire will help it to grow. We will make sure it does not get too hot though.
We found our 5 gallon bucket on the side of the road. It was food grade so we decided it would be a good bucket to grow in. How can you tell if your bucket is food grade? Wiki How says to check the number within the arrows on the bottom of your bucket. #s 1,2,4, and 5 are all safe for food, with the best being #2 for food grade. Check out that link. Lots of good info there! You can buy food grade buckets online HERE or check out your local bakery. A lot of times they will give you their buckets for free or sell them to you for a low cost.
Well, wish us luck! :D
We will update you soon!
Have you ever grown potatoes in a 5 gallon bucket? How did it do? We LOVE your comments!
Disclosure: I am Amazon Affiliate and may receive a small compensation for including links on my blog. Buying through my links is not necessary, just appreciated. Amazon does not charge extra for linked items recommended by their affiliates. I only recommend products that I use and trust OR plan on using in the future. Please buy responsibly and do your own product research before buying anything online.
Earlier this month, my daughter and I were discussing the 'mysterious' plants in our edible landscape. We discovered they are pumpkins. 3 little pumpkin plants have turned our front yard into a jungle.
And yet, there are only 3 pumpkins that have actually gone to fruit.
We sat on the lawn, talking about pollination and the lack of bees this year. I played with a tendril absentmindedly as we discussed trying to pollinate them ourselves. Suddenly, I realized the tendril was slowly wrapping around my finger. My daughter was also touching a tendril and it had started to curl as well. We played with several of the tendrils until we had an idea. Maybe, we should video this and post it for others to see? This may be common to country folk, but to us city girls, this was simply amazing! We decided others might feel the same as well. So we made a video.
In botany, a tendril is a specialized stem, leaf or petiole with a threadlike shape that is used by climbing plants for support, attachment and cellular invasion by parasitic plants, generally by twining around suitable hosts. They do not have a lamina or blade, but they can photosynthesize. They can be formed from modified shoots, modified leaves, or auxiliary branches and are sensitive to airborne chemicals, often determining the direction of growth, as in species of Cuscuta.[1]
Answers In Genesis says:
'When a tendril touches a fence post or similar object, it produces auxin, which is sent to other cells that have not touched the object. These cells then grow faster than the cells in contact, causing the tendril to curl around the object. The tendrils then use the object to support the plant and allow it to climb.' You can find the rest of this article HERE.
So basically, it is sensitive to touch and tries to wrap itself around what ever it touches to provide more support for the growing plant. AMAZING! Ready for the video? Now be nice! This is our first one!
Isn't that amazing!
Disclosure: I am Amazon Affiliate and may receive a small compensation for including links on my blog. Buying through my links is not necessary, just appreciated. Amazon does not charge extra for linked items recommended by their affiliates. I only recommend products that I use and trust OR plan on using in the future. Please buy responsibly and do your own product research before buying anything online.
I've been seeing a lot of posts about 'Grow Gardens, Not Lawns.' This year I decided I would try my hand at it. I have ran into a few problems, but all in all, I am pleased. I chose a couple of beds that were already in my yard and planted herbs and veggies.
This one only worked out 1/2 okay. Originally, we planted dill on one side of our peach tree and carrots and spinach on the other. A little gopher/mole type thing decided we had planted it for him, and ate all of the spinach and carrots. (Insert sad face here) He never touched the dill and drowned in a bowl of water about a week later. Too late for our poor carrots and spinach. I can't wait to harvest my dill and then I will try again with the lettuce and spinach for the cooler months. Not sure if I will ever try carrots again though.. I've never had any luck.
This is as much of our container gardening/recycle project just as much as edible landscape. I found an old tractor rim with the center cut out at my mom's house that was abandoned by my brother in law. I loved finding it! It was pretty heavy but I managed to get it in the back of my truck all by myself. My daughter and I planted a few sweet onions, lettuce and wild onions in it. Then after the gopher/mole thing ate my other spinach, we planted spinach in it as well. The lettuce has done better here than anywhere else, but the spinach, not too well. There is also a redbud tree growing in it. It is a temporary home till we decide where we want to put it. Might not be too bad there though.
In our front yard we have a 'mystery' plant growing! It is a mystery because my seedlings got dumped over and mixed up before they were able to be planted. The leaves and blooms are huge but the fruit is not producing well. The only ones that even started to grow died out before I could tell what they were. I thought it was zucchini but the fruit looked like little round balls. This is the area of the front yard that scored very high in our 'Soil Sample' project. Maybe it just needs some more time. There has also been a lack of bees in our yard this year, even with the flowering privet trees. Could that be why the flowers are not forming fruit? Also in the photo are my little flower pots with cilantro, spinach and lettuce in them.
There is another bed around a tree that I started asparagus in but it a new growth and photos do not turn out well. The plant is thin a wispy looking. Hard to see what you are looking at.
Well, that concludes my edible landscape. I know it is not much, but its a start. I love this idea along with container gardening. However, I am determined NOT to buy any containers to grow in. Recycle, Reuse, Re-purpose is our motto! I would love to hear about and see your edible landscape! One day, I hope to have so many containers, my place looks like this :)
Disclosure: This post contains no affiliate links, however, I am Amazon Affiliate and may receive a small compensation for including links on my blog. Buying through my links is not necessary, just appreciated. Amazon does not charge extra for linked items recommended by their affiliates. I only recommend products that I use and trust OR plan on using in the future. Please buy responsibly and do your own product research before buying anything online.
One of the best FREE curriculum I have found for gardening is Nutrients4life. After watching video #2 Properties Of Soil we were inspired to do our own soil testing to find where would be the best spot for our garden in the spring.
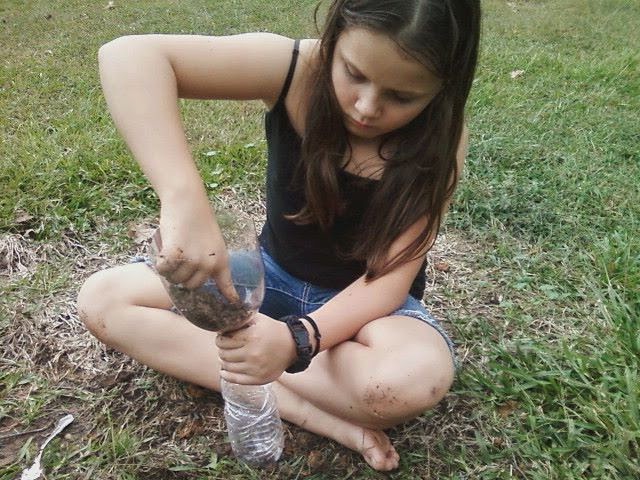
We started by choosing the top 5 spots on our property we were thought a garden would do well. After going over the 5 things a plant needs (soil, water, air, sun, room to grow), she dug holes as far down as she could go, putting a bit of the soil in a recycled plastic bottle. We went on to the next spot until all 5 bottles were filled. Next she added water to the bottles and shook them up. We guestimated which ones we thought would make the best garden. Then we let the bottles settle over night. We looked at the results and made observations at the contents of each bottle. Unfortunately, we discovered the best soil in on our property is in the worst spot! The front yard had the best mix of soil, sand and organic material. However, there is limited space for a large garden and daddy had already said he did not want to step over a bunch of plants and have to weed eat around them. Then we discovered the most optimal location with the best sun, water source and space has very clay like soil and would not make a very good garden. In the end, decided out by the creek would be our best location because it had good soil, air, sun and plenty of room to grow! We would just have to get another hose to extend the reach of the water source. Here are the photos of my daughter collecting the soil samples.
First we needed a funnel to help get the soil into our recycled water bottles.
She dug up soil from the first area and put it into a bottle.
Soil sample #1 complete!
A few more areas and a few more samples and we were finished!
TaDa!
Our completed soil samples after they had set overnight!
I bet you can tell which one has the greatest soil in it!
for FREE downloadable curriculum, videos and lesson plans
for elementary students all the way to highschool!
Want to just see the video that inspired us?
Disclaimer- I am in no way affiliated with Nutrients4life.org and I was not paid or asked to advertise for them. This is just our account of how we were inspired to do our own science experiment! However, I am Amazon Affiliate and may receive a small compensation for including links on my blog. Buying through my links is not necessary, just appreciated. Amazon does not charge extra for linked items recommended by their affiliates. I only recommend products that I use and trust OR plan on using in the future. Please buy responsibly and do your own product research before buying anything online.