This is not an affiliate post
In her writing class at the Co-op, my daughter was asked, "What do you want to do when you grow up?" This is her writing assignment paper....
I will wake up at 3 a.m. every morning. My husband will make me pancakes for breakfast with faces on them. I will have an off grid home in the mountains of Colorado. I will have 4 kids and I will homeschool them and teach them how to cook. My home will have 10 rooms and 2 bathrooms. My yard will be 400 acres. There will be a lake with fish in it. There will be a boat for me and my kids to fish in it. We will hunt for our meat and grow our own vegetables. My property will have 5 barns. The first barn will be for gardening and food. The second barn will be full of wood and solar panels to power my home. Me and my husband will cut down trees for the firewood. The third barn will be for sewing and I will make my kids blankets and clothing. I will also make blankets to donate for people who do not have a home. The forth barn will be a play house for my kids with couches, a t.v. and lots of arts and crafts stuff. Animals will be in the 5th barn for when it is cold or rainy. We will have pigs, chickens, bunnies, deer, sheep, cows and horses. Our animals will have their own fenced in yards with gates. We will have a German Sheppard for our dog. My horse will be black and I will put blue stripes in my horses hair. I will have several freezers to put my food into. I will have a big diesel truck that is loaded with canned and freeze dried foods. They will be in alphabetical order so they are easy to find. I will cook all sorts of foods. My family will eat dinner together every night. My family will be prepared for all sorts of emergencies. If something bad were to happen, I would go get my Mom and Dad from Texas so they could be safe and live with us. I will go to bed at 10 p.m. and pray to God every night.
All I can say is..... <3
Our family teaches homesteading, DIY, survivalist skills, life skills as part of our homeschooling curriculum. Thank you for joining us on our journey to become more self sufficient!
Showing posts with label home making skills. Show all posts
Thursday, December 11, 2014
When I Grow Up: A Writing Assignment
Labels:
animals
,
farm
,
Growing up
,
home making skills
,
homeschool
,
homestead
,
off grid
,
Writing
Sunday, November 30, 2014
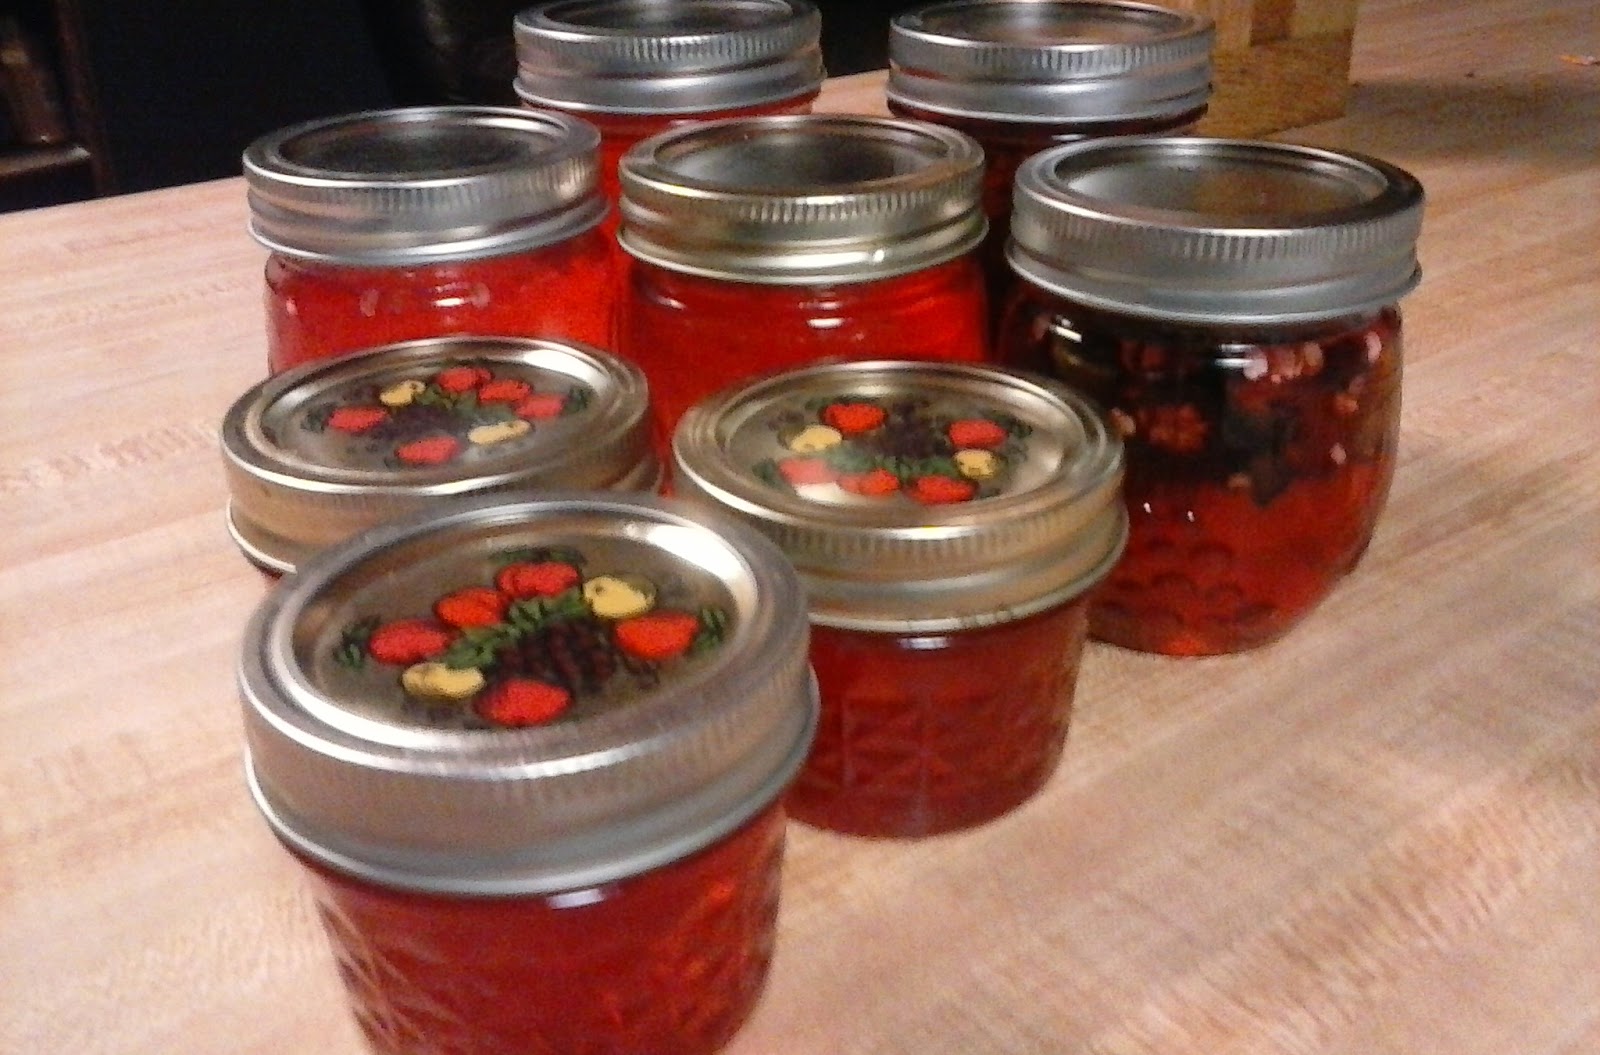
Our First Jelly- Red Jalapeno
We are not very big jelly eaters. Maybe every once in a while we will eat it, but not enough to get all crazy about canning jelly. We ended up with a whole lot of jalapeno peppers from our garden and our amazingly awesome neighbor, Bree, brought over more. I didn't know what to do with all of these peppers, we are not big pepper eaters either! Good grief, so many peppers, so little eating going on! My sister and brother in law are huge spicy food lovers. In the past, I have bought Jalapeno Jelly for them from a friend of mine. So, why not make something jalapeno for them?
My first idea was actually more like a jalapeno syrup you pour over a cream cheese bar and eat on crackers. For the life of me, I couldn't find a recipe for it, and no one I talked to in my canning groups really even knew what I was talking about... But I know I have eaten it somewhere before. After about a week of asking and researching, I finally gave up. Jalapeno Jelly it is!
I found a recipe on Taste Of Home that I thought looked pretty easy. Zoey and I got to work! I sliced up all the jalapenos (with gloves on) but we could not get our hand crank chopped to dice them up in small pieces. We went ahead and boiled them sliced. Zoey added all the ingredients, including some red food coloring. She did not think it looked very yummy in it's normal light yellowish color. I poured the extremely hot liquid into the jars. We did not strain the jalapenos from the liquid, like the recipe calls for. We strained the jalapeno slices into 2 of our jelly jars and then added the jelly liquid over them. After all of our jars were filled, we water bathed them for 5 minutes.
The jelly set perfectly, except for the 2 we left the jalapeno slices in. They were more syrupy. Yea! Maybe we figured out how to make the yummy syrup to pour over cream cheese? We ended up with 8 jelly jars. (I don't even know what size they are. They were given to us from a friend on Facebook.) There was a tiny bit left over that would not fit into the jars. We poured it into a small bowl and placed in the refrigerator. After it had set, we tried a little on toast with butter. I was really surprised; it was good! Not too spicy, but sweet with a kick to it on the end!
I gave my sister her jar, they have yet to open it. They are saving it for a special occasion to eat over cream cheese. I'm a bit disappointed. I really wanted them to try it and tell me how it was. I thought at least with Thanksgiving in full swing, they would have eaten it sometime or another... Nope.
On Thanksgiving with my in-laws, Zoey decided to pull out all of our food stuffs we have been preserving and show EVERYONE! She wanted to open a jar of the jalapeno jelly for everyone but I didn't really want a jar open that would sit in our fridge and spoil. When she showed my father in law the jelly, he asked to try it. HE LOVED IT! He snuck the remainder of the jar into his jacket pocket to take home. Zoey was so proud and beamed her radiant smile. Feels pretty good to finally have someone like our jelly. He might be getting some more for Christmas (his suggestion!)
Hot Pepper Jelly from Taste Of Home
1/2 cups white vinegar
1 medium sweet red pepper cut into wedges (we used neighbors mixed peppers)
2/3 cup of chopped habanero peppers (we used regular)
6 cups of sugar, divided
2 pouches (3 ounces each) of liquid fruit pectin
1 teaspoon of red food coloring (optional, try green too)
Directions
1. Place vinegar and peppers in a blender; cover and puree. Add 2 cups of sugar; blend well. Pour into saucepan. Stir in remaining sugar; bring to a boil.
2. Strain Mixture and return to pan. Stir in pectin and food coloring if desired. Return to a rolling boil over high heat. Boil for 2 minutes, stirring constantly.
3. Remove from heat; skim off foam. Carefully ladle hot mixture into hot sterilized half pint jars, leaving 1/4 in headspace. Remove air bubbles, wipe rims and adjust lids. Process in a boiling-water canner.
4. Serve with cream cheese on crackers
Yield: 5 half Pints
Editor's Note: When cutting hot peppers, disposable gloves are recommended. Avoid touching your face. The processing time listed is for altitudes of 1,000 feet or less. Add 1 minute to the processing time for each additional 1,000 feet of additional altitude.
Now this recipe is taken verbatim from Taste Of Home. I have tried this recipe and had great results. If you have a problem with this recipe or any recipe from them, please contact them directly. They are serious about wearing gloves and not touching any part of your body when handling any hot peppers. Peppers contain oils that are hard to get off of skin and will burn you like wild fire! Use extreme caution! If you happen to get some on yourself, soak the affected body part in milk. Raw milk is best, but my milk in the fridge helped as well.
Also, I am in no way affiliated with Taste Of Home. I am just passing on a recipe we happen to enjoy. :)
Labels:
canning
,
food preservation
,
home made
,
home making skills
,
homesteading
,
jalapenos
,
Jelly
,
kids cooking
,
water bath
Wednesday, November 26, 2014
Make Some Cookies With That Girl!
When my son was an infant, many, many moons ago, a good friend of mine came over while I was baking cookies. She was amazed that I was making cookies with out a mix. I was amazed she had never made cookies unless they came out of a tube or a 'just add water' bag. I have thought of this many times over the years. How sad it was to me that she had never made homemade cookies before. Fast forward to many many moons later and I realized, I have never made homemade cookies with my own daughter!
How could that happen? Mrs. 'I'm all about the homemade, from scratch' has never made cookies from scratch with her own daughter? Seriously? We make cookies a lot, but they always come from a tube. Crazy, right? Well, in our last house, sometimes the cookies didn't always turn out the best. Then, the oven went out. In this house... okay, I have no excuses. I honestly didn't even realize we had never made cookies from scratch before. Not until Zoey and I were at the store buying ingredients for the cookies we wanted to make. She kept saying, "But Mom, we need to get dough!" I was not really understanding what she was saying until she said, "For the cookies, duh..." Oh. Ummm.... Whoops! Time to have a homemade cookie talk and make some cookies with that girl!
So what kind of cookies did we want to make? Chocolate chip, pecan, coconut cookies! Our very favorite neighbor, Bree, gave us some pecans from her yard and Zoey shelled them last week. Then I saw a recipe for 'Cowboy Cookies' and we thought they sounded great. We forgot to get oatmeal at the store, so me made the old tried and true chocolate chip cookies and added pecans and coconut to them.
I didn't take any photos while we were making cookies. I wanted this to be a Mommy and Me moment. No camera, no staging, just me and her making cookies. Like it is supposed to be. Cookie pictures came after.
Here is the recipe:
Chocolate-Coconut-Pecan Cookies
(We could not come up with anything better!)
1 cup of butter (room temperature)
3/4 cup of granulated sugar
3/4 cup of packed light brown sugar
1 teaspoon of vanilla extract
2 eggs
2-1/4 cups of all purpose flour
1 teaspoon of baking soda1/2 teaspoon of salt
1 bag of semi-sweet chocolate chips
1 cup of coconut
1 cup of chopped pecans
If you have never baked with your family, why not try some today. Cooking with your kids is a great way to spend family time. They learn fractions, a bit of chemistry, and it is a great bonding experience. Not to mention, you will have lots of yummy cookies!
Remember, if you have a nut allergy, leave the pecans out! Please use common sense when trying anything you find on here or the web! Also, if you eat the dough raw, you will put yourself in the position to possibly get salmonella from raw eggs. So don't eat the dough!
Labels:
cookies
,
Cooking
,
home made
,
home making skills
,
homesteading
,
kids cooking
Monday, October 20, 2014
Things I Learned From My Grandparents (and didn't even know I was learning)
Instead of a back yard, they had a strawberry garden. It was on a an incline, but there were rows and rows of strawberries. One year, while I was hunting for strawberries, I ran my hands over the plants and screamed. There was a large snake hiding under the strawberry plants. I ran to my grandpa to tell him. He got a shovel and went over to get rid of the snake. However, when he got over there, the snake turned out to be the garden hose. We all got a good laugh out of it.There was a large garden in the back of the property. Grandpa was always in the garden hoeing, planting, tilling, weeding, and/or raking. He worked from sun up to dinner time. Sometimes we would help him. My brother and I would go out with grandpa early in the morning and pick vegetables with him. He had the most amazing tomatoes in all shapes and sizes. We would munch on small yellow and cherry tomatoes as we picked. There were rows of beans and and purple hull peas. We picked okra that my grandma fried up fresh and froze the rest. When we were finished, I would sit on the back porch with Grandma and snap beans. Every once in a while, I would pop a fresh bean into my mouth.
Grandma also had cans with herbs growing in coffee cans on the back of the house. We nibbled on fresh mint while we played on the grass. It made our mouths feel cool and fresh. Every once in a while, Grandma would ask us to pick some of the herbs. We watched as she cleaned them and then laid them on a cookie sheet lined with paper towels to dry.
Grandpa had a snake in the wood pile we called his 'pet.' Every morning grandpa would go out to the woodpile he was greeted by a scarlet king snake. It never harmed anything and my grandpa told us that the snake helped to keep those pesky rodents away. Grandpa would talk to the snake as if it was his friend. Not all snakes were his friends though. One day my cousins, brother and I were walking past the propane tank and Grandpa was coming towards us on his way to his neighbors property. He turned suddenly and walked over to his gardening shed at a brisk pace. We were already at the house when we noticed Grandpa going back towards the propane tank with a shovel. Suddenly, Grandpa was striking at something on the ground. We ran over to see what was happening. Grandpa hollered to "Stay Back!" It was a rattlesnake! AND we had just walked past there and never saw it! Grandpa killed it effortlessly. When he severed the head, we came in a bit closer. Grandpa cautioned us to not get to close and explained when a snake dies, it can still hurt you. He held the shovel up to the snakes mouth. We all gasped as the snake bit at the shovel. Grandpa moved the shovel to the body and the body STOOD up and tried to strike at the shovel even though it had NO HEAD! Although it had no eyes, it followed the movements of the shovel perfectly. We marveled at the snakes body as it continued to move after being decapitated. It seemed like it took forever to stop wiggling along the ground. We paid more attention from now on while walking around the property. When we came into the house from outside, the back door led to the utility room. We had to be quick on the ins and outs so flies could not come in and the air conditioning could not get out. We were not allowed to keep coming in and out either. Once outside you stayed out side for a while. Coming in had the same rule. Grandma explained this helped to keep their electric bill down. We had to leave our shoes by the back door to keep the dust and dirt out of the rest of the house. In the utility room, Grandma always keep an ice cold water jug for us. We could drink as much as we wanted, but you better make sure you did not waste any. It was from the well and we didn't need the well running dry. On the washer and dryer was usually homemade raspberry gobbler from the berries we collected for Grandma. It was one of the best things I have ever put in my mouth.
I loved watching my grandmother sew and mend clothes. She made nearly all of her clothes. It was almost like magic when she made skirts and shirts, curtains out of thin pieces of paper, pins and fabric. After cutting her patterns out, the neatly folded them back up and placed them back in their packaging, to be used at a later time. I watched silently as her sewing machine quickly and easily joined the fabrics. My Grandma crocheted as well. She taught me how to make chains and simple crochet loops. I would play with my long piece of yarn over and over, practicing until I could get my links and chains just right. I couldn't have whole ball of yarn until I mastered the beginning stages of crocheting; yarn could not be wasted.
I slept in the spare bedroom on a sleeper couch. The room doubled as Grandma's sewing/craft room and her extended pantry. There was one wall that had built in shelves lined with items my grandma had canned. Rows upon rows of the most amazing looking food items. Jams, jellies, relishes, vegetables, fruits, and meats. Chow-chow was one of my grandmother's specialties. Oh, how I hated chow-chow as a child. Now I plan on making it one day so I can try it again. She made the best dill pickles. Fresh dill flower heads graced the jar. I tried eating one once, it was horrible, and I couldn't figure out why on earth someone would put a weed in with the glorious pickles. I never saw my grandma can, but I did get to watch her make jelly out of the fresh strawberries from their patch. It seemed like a lot of work, but the jelly was well worth it! I always wondered why just two people would need all of that food. There were so many of them! At night I would lay there and look at the wall of jars, counting them by the moonlight until I fell asleep.
For the longest time, I wondered why most of my memories with my grandparents seemed to center around food. It was not until I started my own homesteading journey that I realized why. They lived on a fixed income, Grandpa's retirement. Everything the did around the mountain property was to prepare for everyday life. From food preservation, to chopping wood, to recycling, reusing, re-purposing, DIY, it was all about survival. Not in the sense of what people think of prepping and survivalist skills now. This was day to day, what they learned from their parents, this was natural for them.
By watching them and joining them in their everyday tasks. I learned. I didn't realize it at the time, but I was learning from them. Everything that I watched and did as a child has become so 'natural' for me now. Even though I never actually was taught how to sew, I 'naturally' knew how to. I say I was self taught, but in essence, watching my grandmother sew, taught me how. I am also a natural gardener, saver, recycling/re-purposing, homesteading, DIY, make your budget stretch type of person. I wish my grandparents were still with us today. I would make sure I asked the questions I missed being able to ask them when I was young. At least I have my memories. These are memories I want for my children. I want the ability to take care of their families to be 'natural' for them. Children mimic and take on the habits of those they are around. I hope to pass on to my children what my grandparents pass on to me.
The pictures in this post are not of me and my brother. They are of my cousins, Erin and Garrett. Their mother was a lot better at preserving memories through photography than my family was. Thank you Erin and Garrett, for finding these photos for me. Love you!
Labels:
clothes
,
DIY
,
family
,
food preservation
,
grandma
,
grandpa
,
hands on learning
,
home making skills
,
homesteading
,
life lessons
Saturday, October 11, 2014
We Butcher A Chicken...
WARNING- This post contains photos of a family sending their own chicken to freezer camp! If you are not the chicken killing type, or if you are disturbed by information or images of animals being butchered, please, DO NOT READ THIS POST. We are on the path to self sufficiency, and raising our own food is part of this journey.
"We butchered a chicken today. Great life lesson and anatomy lesson. There is something... satisfying... to be able to provide a meal for your family that you know what it was fed, you know how it was treated, you know how it was butchered, and you know how it was prepared. I don't know if we will ever do another, but, we are happy with today." -Personal Facebook Post February, 2014
We have become a society disconnected with our food. Rarely does anyone know where or how their food is processed. We buy our meat in nice, little wrapped packages, and not once do we question where it came from. How were they raised and in what conditions? What were they fed? How was it processed? The chicken from the stores is kept in giant barns crammed full of thousands of chickens, all pecking at each other, or standing there waiting to die. Don't believe me? Type in your computer, 'what are chickens fed to make them grow so fast?' and see what comes up. Quick link to Wikipedia says, well it says a lot.. Just read for yourself.
I am in no way condemning anyone for eating supermarket chicken. I buy it all of the time still. My family loves chicken and I am not a lover of butchering my own meals. Honestly, I hope to grow out of this. I have already come quite a ways from the girl I used to be. In the past, if it did not come from the supermarket, wrapped up nice and neat in Styrofoam and plastic wrap, I wouldn't eat it. We were given some hamburger from my uncle one time and while my family raved about how wonderful my meatloaf was, I was in the bathroom gagging and hearing Uncle Mark call out 'Calfy' to his cow. Fresh eggs? FORGET ABOUT IT! That was just disgusting! (My sister is still this way!) In my quest for self sufficiency, however, I have grown to realize the importance of knowing where my food comes from. This is not important to everyone, but it is important to me.
My husband's, mother's, boyfriend's. granddaughter (phew, did you catch all that?) raised chickens for FFA. When the project was finished, we were asked if we wanted them. They are Cornish Rock Cross and are breed to grow quickly. This also makes them unlikely to ever mate, lay eggs, or live past a certain age. And while I was not yet 'there' in my homesteading journey, I felt if I was going to 'Talk the talk...' I had better start down this road when I was offered the chance at no cost to me.
My daughter helped me along on our first journey. We researched, read articles and watched youtube videos on butchering chickens. We decided to go with the 'cone method' of butchering. We took a milk jug, just like on the video we watched, and cut out the bottom of it. Then you put the chickens head through the hole and slit its throat. As it drains of blood it goes peacefully to sleep. Or rather, that's what is supposed to happen. Nothing could prepare us for our first time. Like I always seem to say, you think you know, but it never turns out how you expected. The chicken fought going into the milk jug hole, the incision clotted up instantly, then, the chicken cluck/cussed us, saying we were doing it wrong. Hubby came to the rescue with an ax. Note to self: Never, ever try that method again.
Plucking took nearly and hour, even with dunking in the hot water several times. We have since learned that the skin is not that important to us, even when frying. It is a lot quicker to skin. We do not eat anything on the inside, so it is all boiled and fed to my dogs. We did find a lot of little orange balls we discovered were the beginning yolks of eggs. That is how we ended up keeping 'Prissy,' our first hen to lay an egg.
It was very educational for my daughter. She learned a lot about chicken anatomy. She is like me (not crazy about killing the chicken) but she loves to identify the organs. She loves to cook our homegrown meat as well. She has very little attachment to the chickens because we have told her from the beginning these were 'food, not friends.' My hope for her is to become a veterinarian or be in another medical field. I believe she will be great healer one day.
Just in case you continued to read, but were uncertain if you wanted to see the photos, I have saved them for last. The are not really terribly awful in my opinion, but this is your last chance to go check out one of my other articles. You can see my daughter make store bought Cornish Hens in my post HERE. Again, you are reading a blog about our homeschooling/homesteading family's quest to become more self sufficient. Thank you for your support.
We have sent several chickens to 'Freezer Camp' and I plan on sending more soon. If this is not your cup of tea, I understand. I used to be that girl remember? But it is now something I take pride in. My meat was raised by me. They were fed a healthy diet twice a day and also free range all day long. I know how they were treated, I know how they are processed. I know they were healthy and will provide a healthy meal for my family. Thank you for joining me on my journey.
"We butchered a chicken today. Great life lesson and anatomy lesson. There is something... satisfying... to be able to provide a meal for your family that you know what it was fed, you know how it was treated, you know how it was butchered, and you know how it was prepared. I don't know if we will ever do another, but, we are happy with today." -Personal Facebook Post February, 2014
We have become a society disconnected with our food. Rarely does anyone know where or how their food is processed. We buy our meat in nice, little wrapped packages, and not once do we question where it came from. How were they raised and in what conditions? What were they fed? How was it processed? The chicken from the stores is kept in giant barns crammed full of thousands of chickens, all pecking at each other, or standing there waiting to die. Don't believe me? Type in your computer, 'what are chickens fed to make them grow so fast?' and see what comes up. Quick link to Wikipedia says, well it says a lot.. Just read for yourself.
I am in no way condemning anyone for eating supermarket chicken. I buy it all of the time still. My family loves chicken and I am not a lover of butchering my own meals. Honestly, I hope to grow out of this. I have already come quite a ways from the girl I used to be. In the past, if it did not come from the supermarket, wrapped up nice and neat in Styrofoam and plastic wrap, I wouldn't eat it. We were given some hamburger from my uncle one time and while my family raved about how wonderful my meatloaf was, I was in the bathroom gagging and hearing Uncle Mark call out 'Calfy' to his cow. Fresh eggs? FORGET ABOUT IT! That was just disgusting! (My sister is still this way!) In my quest for self sufficiency, however, I have grown to realize the importance of knowing where my food comes from. This is not important to everyone, but it is important to me.
My husband's, mother's, boyfriend's. granddaughter (phew, did you catch all that?) raised chickens for FFA. When the project was finished, we were asked if we wanted them. They are Cornish Rock Cross and are breed to grow quickly. This also makes them unlikely to ever mate, lay eggs, or live past a certain age. And while I was not yet 'there' in my homesteading journey, I felt if I was going to 'Talk the talk...' I had better start down this road when I was offered the chance at no cost to me.
My daughter helped me along on our first journey. We researched, read articles and watched youtube videos on butchering chickens. We decided to go with the 'cone method' of butchering. We took a milk jug, just like on the video we watched, and cut out the bottom of it. Then you put the chickens head through the hole and slit its throat. As it drains of blood it goes peacefully to sleep. Or rather, that's what is supposed to happen. Nothing could prepare us for our first time. Like I always seem to say, you think you know, but it never turns out how you expected. The chicken fought going into the milk jug hole, the incision clotted up instantly, then, the chicken cluck/cussed us, saying we were doing it wrong. Hubby came to the rescue with an ax. Note to self: Never, ever try that method again.
Plucking took nearly and hour, even with dunking in the hot water several times. We have since learned that the skin is not that important to us, even when frying. It is a lot quicker to skin. We do not eat anything on the inside, so it is all boiled and fed to my dogs. We did find a lot of little orange balls we discovered were the beginning yolks of eggs. That is how we ended up keeping 'Prissy,' our first hen to lay an egg.
It was very educational for my daughter. She learned a lot about chicken anatomy. She is like me (not crazy about killing the chicken) but she loves to identify the organs. She loves to cook our homegrown meat as well. She has very little attachment to the chickens because we have told her from the beginning these were 'food, not friends.' My hope for her is to become a veterinarian or be in another medical field. I believe she will be great healer one day.
Just in case you continued to read, but were uncertain if you wanted to see the photos, I have saved them for last. The are not really terribly awful in my opinion, but this is your last chance to go check out one of my other articles. You can see my daughter make store bought Cornish Hens in my post HERE. Again, you are reading a blog about our homeschooling/homesteading family's quest to become more self sufficient. Thank you for your support.
Our FAIL...
Getting the insides out.
Don't you just love her protective gear!
An hour to pluck it and it still looked like this?
The end result.
We decided to stuff and slow roast our chicken. We learned from our Cornish Hen dinner that we like seasonings, and this time we did it right. It was delicious and tender. I had forgotten to take a photo of it when we were finished cooking it. The photo above is what we had LEFT after dinner. Two adults and a 10 year old barely made a dent. I pulled off the rest of the meat and separated it into family sized portion freezer bags. We got 4 more meals out of this one bird. 5 meals for free.
We have sent several chickens to 'Freezer Camp' and I plan on sending more soon. If this is not your cup of tea, I understand. I used to be that girl remember? But it is now something I take pride in. My meat was raised by me. They were fed a healthy diet twice a day and also free range all day long. I know how they were treated, I know how they are processed. I know they were healthy and will provide a healthy meal for my family. Thank you for joining me on my journey.
Labels:
anatomy
,
butchering
,
chicken
,
chickens
,
DIY
,
eating
,
edible
,
family
,
farm
,
food
,
free
,
fresh
,
home making skills
,
homesteading
,
kids cooking
,
life skills
,
raising your own food
,
walk the walk
Saturday, July 12, 2014
It's Washing Day!
This blog post contains Affiliate Links.
Finally, it is clothes washing day! We had such a great response to our wash tub post but it has taken a while to actually get to the point where we could wash our clothes. Life has a way of getting in the way, especially if you have one foot into the rat race and another on a homestead.
First, my mother got very sick right after I posted my daughter was excited about washing her clothes in a washtub with a wash board. Mom was in hospital with double pneumonia that turned into ARDS and was transferred to a specialist hospital over an hour away from where we live. It was very scary for a while, but she is out now and doing great! My daughter and I were commuting back and forth to be with her, and spending more time away from home then we were actually here. (At least that is the way it felt.) My mom is one of the most important people in the world to me, I have no regrets being there for her. It just put our clothes washing day on hold.
Second, my boss let us borrow her washboard that she says is around 150 years old. Mrs. C is in her 70s (you would not know this if you met her) and it was her grandmothers when she was a child. It was passed down to her, but she remembers it being used regularly when she was a child. But as it goes for busy women, when I was able to go to work in between doctor and hospital visits, I would forget to remind her to bring in her washboard, and she was working and taking up the slack for me not being at work, so she would forget to bring it. Yesterday, we were surprised to find it sitting on her desk.
And then, there is the soap issue! Mrs. Joyce is our adopted grandmother and we were treated with a story about when she was my daughters age. On Saturdays, she was allowed to wash her own clothes in her own little washtub. It made her feel grown up and special. She remembers using the homemade lye soap, washing, rinsing, and hanging her clothes to dry. Homemade lye soap? Well of course we had to Google it! After reading an article on Mother Earth News, I decided this was not a project I wanted to embark on that project on my own just yet. We have a family friend that owns a soap and herbalist shop that is not too far from us. Unfortunately, she does not make lye soap. We will be able to come watch and help her make soap at a later date, but for now, we were still on the search for lye soap.
At one of our little hometown country feed/ building materials stores, we finally found what we were looking for. Sort of. The lye soap they had was from a little small business, but it was a bath and body bar, and not for clothing. Maybe if it smelled good, we would have still used it, but my daughter did not like the unscented version and did not want to use it. Then, I spied the Fels-Naptha bar. We smelled it and it was lovely. So Fels-Naptha it is! AND, the best part for me is that we are going to learn to make our own regular laundry detergent, so we will get double use out of the same little $1.49 bar! Can't beat that! (Amazon is a lot higher, look for it locally to save money.)
Before we get started, we will be reviewing the videos on YouTube we found for washing your own clothes the old fashioned way. Mom With A Prep had a lot of different ways, links and sources for washing your own clothes including a video of a lady that washes her own on a regular basis. Another one we are watching is of a little girl that shows you how to wash using a wash board. You can see the video HERE.
Finally, it is clothes washing day! We had such a great response to our wash tub post but it has taken a while to actually get to the point where we could wash our clothes. Life has a way of getting in the way, especially if you have one foot into the rat race and another on a homestead.
First, my mother got very sick right after I posted my daughter was excited about washing her clothes in a washtub with a wash board. Mom was in hospital with double pneumonia that turned into ARDS and was transferred to a specialist hospital over an hour away from where we live. It was very scary for a while, but she is out now and doing great! My daughter and I were commuting back and forth to be with her, and spending more time away from home then we were actually here. (At least that is the way it felt.) My mom is one of the most important people in the world to me, I have no regrets being there for her. It just put our clothes washing day on hold.
Second, my boss let us borrow her washboard that she says is around 150 years old. Mrs. C is in her 70s (you would not know this if you met her) and it was her grandmothers when she was a child. It was passed down to her, but she remembers it being used regularly when she was a child. But as it goes for busy women, when I was able to go to work in between doctor and hospital visits, I would forget to remind her to bring in her washboard, and she was working and taking up the slack for me not being at work, so she would forget to bring it. Yesterday, we were surprised to find it sitting on her desk.
And then, there is the soap issue! Mrs. Joyce is our adopted grandmother and we were treated with a story about when she was my daughters age. On Saturdays, she was allowed to wash her own clothes in her own little washtub. It made her feel grown up and special. She remembers using the homemade lye soap, washing, rinsing, and hanging her clothes to dry. Homemade lye soap? Well of course we had to Google it! After reading an article on Mother Earth News, I decided this was not a project I wanted to embark on that project on my own just yet. We have a family friend that owns a soap and herbalist shop that is not too far from us. Unfortunately, she does not make lye soap. We will be able to come watch and help her make soap at a later date, but for now, we were still on the search for lye soap.
At one of our little hometown country feed/ building materials stores, we finally found what we were looking for. Sort of. The lye soap they had was from a little small business, but it was a bath and body bar, and not for clothing. Maybe if it smelled good, we would have still used it, but my daughter did not like the unscented version and did not want to use it. Then, I spied the Fels-Naptha bar. We smelled it and it was lovely. So Fels-Naptha it is! AND, the best part for me is that we are going to learn to make our own regular laundry detergent, so we will get double use out of the same little $1.49 bar! Can't beat that! (Amazon is a lot higher, look for it locally to save money.)
Before we get started, we will be reviewing the videos on YouTube we found for washing your own clothes the old fashioned way. Mom With A Prep had a lot of different ways, links and sources for washing your own clothes including a video of a lady that washes her own on a regular basis. Another one we are watching is of a little girl that shows you how to wash using a wash board. You can see the video HERE.
So now here we are, all set and ready for her to wash her own clothes.
Wish us luck!
Wish us luck!
This is a 3 part series! See also,
Disclosure: I am Amazon Affiliate and may receive a small compensation for including links on my blog. Buying through my links is not necessary, just appreciated. Amazon does not charge extra for linked items recommended by their affiliates. I only recommend products that I use and trust OR plan on using in the future. Please buy responsibly and do your own product research before buying anything online.
Labels:
clothes
,
hands on learning
,
home making skills
,
homesteading
,
laundry
,
wash board
,
wash tub
,
washing
Friday, June 20, 2014
Guess what this is for!
This post contains Affiliate Links.
My daughter is so excited to start her next 'homesteading' project! Can you guess what this big bad boy is for? Yup! She is going to do her own laundry the old fashioned way!
I really can't imagine a kid being excited about doing their own laundry. Especially, doing her own laundry by hand. She is 10. She should be crossing her arms and looking at me like, 'Seriously Mom?' But no, my kid is excited!
I have been running out of cool, original ideas to do to go along with homesteading the old fashioned way. We have been reading 'Little House In The Big Woods' and are enjoying hearing about them preserving all of the meats and food for the winter. (But we are not at that level yet.) We were going to make corn cob dolls, and saved all of the corn husks to make a doll. However, when they dried, they curled up. (Going to have to do some more research on how to do it properly.) We don't have the means to make bullets, or the skills to play the fiddle. She has made butter numerous times with me, AND in public school, with heavy whipping cream. If we make fresh butter again, it's going to be from fresh cream from a cow or goat. I don't have access to either of those at this time, as well....
So I was sitting at work, racking my brains for the next project, when I thought, "Ask Mrs. C!" Mrs. C is my boss and quite the educator herself with nearly 40 years experience! She thought for a minute and first came up with the same tried and true homesteading skills lessons most use. When I told her about the corn cob doll, she understood I was looking for something different. Her face lite up as she said, "I have my mother's wash board." WAHOOO!!!!
Later that night, I asked my daughter if she knew how people used to wash their clothes before washing machines. "I don't know what they are called, but you do this with them," she said moving her hands up and down in a scrubbing motion. "And you use one of those silver tub things!"
"Yes, you scrub them on a wash board that is inside of a wash tub. Guess who has a wash board?"
My daughter's eyes grew big. "Who?"
"Mrs. Carolyn, and she is going to let us borrow it."
My daughter clapped her hands and squealed. "Do I get to make my own soap, too?"
"If you want to!"
"I do!'
Joyously, she danced around singing a happy tune of 'I get to wash my own clothes!' Until suddenly, she was right beside me, wide eyed and asking, "How much are we going to SAVE?" This kid cracks me up! :)
UPDATE: This ended up being a 3 part series, with this being the first part. It's Washing Day is the second post and explains why we did not make our own laundry detergent. The third post is Washing Clothes The Old Fashioned Way where she finally gets to wash her own clothes. Make sure to read them all to get the whole story!
Do you have a favorite DIY Laundry Detergent Recipe? We would love to hear about it!
Disclosure: I am Amazon Affiliate and may receive a small compensation for including links on my blog. Buying through my links is not necessary, just appreciated. Amazon does not charge extra for linked items recommended by their affiliates. I only recommend products that I use and trust OR plan on using in the future. Please buy responsibly and do your own product research before buying anything online.
My daughter is so excited to start her next 'homesteading' project! Can you guess what this big bad boy is for? Yup! She is going to do her own laundry the old fashioned way!
I really can't imagine a kid being excited about doing their own laundry. Especially, doing her own laundry by hand. She is 10. She should be crossing her arms and looking at me like, 'Seriously Mom?' But no, my kid is excited!
I have been running out of cool, original ideas to do to go along with homesteading the old fashioned way. We have been reading 'Little House In The Big Woods' and are enjoying hearing about them preserving all of the meats and food for the winter. (But we are not at that level yet.) We were going to make corn cob dolls, and saved all of the corn husks to make a doll. However, when they dried, they curled up. (Going to have to do some more research on how to do it properly.) We don't have the means to make bullets, or the skills to play the fiddle. She has made butter numerous times with me, AND in public school, with heavy whipping cream. If we make fresh butter again, it's going to be from fresh cream from a cow or goat. I don't have access to either of those at this time, as well....
So I was sitting at work, racking my brains for the next project, when I thought, "Ask Mrs. C!" Mrs. C is my boss and quite the educator herself with nearly 40 years experience! She thought for a minute and first came up with the same tried and true homesteading skills lessons most use. When I told her about the corn cob doll, she understood I was looking for something different. Her face lite up as she said, "I have my mother's wash board." WAHOOO!!!!
Later that night, I asked my daughter if she knew how people used to wash their clothes before washing machines. "I don't know what they are called, but you do this with them," she said moving her hands up and down in a scrubbing motion. "And you use one of those silver tub things!"
"Yes, you scrub them on a wash board that is inside of a wash tub. Guess who has a wash board?"
My daughter's eyes grew big. "Who?"
"Mrs. Carolyn, and she is going to let us borrow it."
My daughter clapped her hands and squealed. "Do I get to make my own soap, too?"
"If you want to!"
"I do!'
Joyously, she danced around singing a happy tune of 'I get to wash my own clothes!' Until suddenly, she was right beside me, wide eyed and asking, "How much are we going to SAVE?" This kid cracks me up! :)
UPDATE: This ended up being a 3 part series, with this being the first part. It's Washing Day is the second post and explains why we did not make our own laundry detergent. The third post is Washing Clothes The Old Fashioned Way where she finally gets to wash her own clothes. Make sure to read them all to get the whole story!
Do you have a favorite DIY Laundry Detergent Recipe? We would love to hear about it!
Disclosure: I am Amazon Affiliate and may receive a small compensation for including links on my blog. Buying through my links is not necessary, just appreciated. Amazon does not charge extra for linked items recommended by their affiliates. I only recommend products that I use and trust OR plan on using in the future. Please buy responsibly and do your own product research before buying anything online.
Labels:
clothes
,
free
,
home making skills
,
homeschool
,
homestead
,
lesson plans
,
little house on the prairie
,
wash board
,
wash tub
Wednesday, June 18, 2014
YOU ATE A WHAT?
This post contains no Affiliate Links. 
As soon as I would tell someone, they would immediately make the sour pucker face, shake all over like a seizure and turn green. Some ran away screaming in fright. So of course I would have to tell them again, "We ate snake last night!" Same reaction, kinda funny. "You ate a what?" "Yes, we ate a snake." Complete and total freak out! Got to love it!
Yes, we ate a snake. Yes, it was good. Yes, we will probably eat another if we can catch one again. "Who killed it?'
"My husband."
"Did you skin and gut it?"
"No, my son did. I didn't even realize what was going on till he brought it to me and asked how he could cook it."
"But, you ate it?"
"Well, yes of course I did!"
(Insert retching/gagging sound here!)
Truth be told, we as a family, have wanted to try snake for a while. That is what happens when your son is a survival show junkie. Since he was old enough to watch t.v. he loved animal documentaries and shows. His teachers would comment on how he was the only one that would watch a documentary when they were studying certain animals. He was glued! When shows like "Survivor Man' started popping up everywhere, he was hooked. What boy in the country wouldn't be? Now that he is older, he has boasted his adventures through the woods and down the creek. (Where he should not have been cause it was forbidden. Can't be mad, cause at his age, that is where I would have been as well!) Many a time has he asked me, "Mom, if i find a snake, will you cook it for me?" "Well, yes, as long as you don't mess with it and show us the snake first so we can make sure it is not venomous" "What if I get a squirrel?" "You skin and gut it, I'll cook it!" Since that day he has watched his shows, dreamed of being a survivalist, and kept a look out for snakes and other critters he could eat.
Once, son and daughter brought me a tiny, thin snake. Rescued from the cat a moment too late, its head was the only thing damaged. "Mom! Let's cook it!" It looked way too small. "If you can skin and gut it, I will cook it!" Several frustrating minutes went by. Not a very easy clean nor a whole lot of meat from the wiggling dead snake. Their faces were priceless. The cat was happy to get his prize back.
So when your 17 year old son, who has waited YEARS to try snake, comes in with it skinned and gutted perfectly and says, "Mom, show me how to cook it!" Well then, that's just what you do!
A small fire was made on the grill. He seasoned it with some garlic salt. (Everything tastes good with garlic salt, right?) My son patiently flipped his snake until it appeared to be finished cooking. When he tried it, he was not impressed. "It doesn't really taste like anything. Can you cook it like you cook garlic chicken in the pan?" In went some butter and garlic into the cast iron. 15 minutes later we were gathered around the kitchen counter, devouring a snake and pulling the delicate meat from around the tiny bones!
Disclosure: This post contains no affiliate links, However, I am Amazon Affiliate and may receive a small compensation for including links on my blog. Buying through my links is not necessary, just appreciated. Amazon does not charge extra for linked items recommended by their affiliates. I only recommend products that I use and trust OR plan on using in the future. Please buy responsibly and do your own product research before buying anything online.

As soon as I would tell someone, they would immediately make the sour pucker face, shake all over like a seizure and turn green. Some ran away screaming in fright. So of course I would have to tell them again, "We ate snake last night!" Same reaction, kinda funny. "You ate a what?" "Yes, we ate a snake." Complete and total freak out! Got to love it!
Yes, we ate a snake. Yes, it was good. Yes, we will probably eat another if we can catch one again. "Who killed it?'
"My husband."
"Did you skin and gut it?"
"No, my son did. I didn't even realize what was going on till he brought it to me and asked how he could cook it."
"But, you ate it?"
"Well, yes of course I did!"
(Insert retching/gagging sound here!)
Truth be told, we as a family, have wanted to try snake for a while. That is what happens when your son is a survival show junkie. Since he was old enough to watch t.v. he loved animal documentaries and shows. His teachers would comment on how he was the only one that would watch a documentary when they were studying certain animals. He was glued! When shows like "Survivor Man' started popping up everywhere, he was hooked. What boy in the country wouldn't be? Now that he is older, he has boasted his adventures through the woods and down the creek. (Where he should not have been cause it was forbidden. Can't be mad, cause at his age, that is where I would have been as well!) Many a time has he asked me, "Mom, if i find a snake, will you cook it for me?" "Well, yes, as long as you don't mess with it and show us the snake first so we can make sure it is not venomous" "What if I get a squirrel?" "You skin and gut it, I'll cook it!" Since that day he has watched his shows, dreamed of being a survivalist, and kept a look out for snakes and other critters he could eat.
Once, son and daughter brought me a tiny, thin snake. Rescued from the cat a moment too late, its head was the only thing damaged. "Mom! Let's cook it!" It looked way too small. "If you can skin and gut it, I will cook it!" Several frustrating minutes went by. Not a very easy clean nor a whole lot of meat from the wiggling dead snake. Their faces were priceless. The cat was happy to get his prize back.
So when your 17 year old son, who has waited YEARS to try snake, comes in with it skinned and gutted perfectly and says, "Mom, show me how to cook it!" Well then, that's just what you do!
A small fire was made on the grill. He seasoned it with some garlic salt. (Everything tastes good with garlic salt, right?) My son patiently flipped his snake until it appeared to be finished cooking. When he tried it, he was not impressed. "It doesn't really taste like anything. Can you cook it like you cook garlic chicken in the pan?" In went some butter and garlic into the cast iron. 15 minutes later we were gathered around the kitchen counter, devouring a snake and pulling the delicate meat from around the tiny bones!
I'm glad my son finally got to try snake, and also, that he was not disappointed!
Yes, we ate snake. Yes, we liked it. AND YES, we will do it again if we get a chance!
DISCLAIMER FOR ALL OF YOU FREAKING OUT CAUSE SNAKES ARE WONDERFUL FOR THE ECOSYSTEM: I agree! And if the snake had not been in a fight with my dog at the time, he might have been able to go along his merry way. My husband did not know if it was venomous or not. Nor did he care at the time. This death did serve a purpose, we ate the flesh for dinner, chickens and dogs ate the insides and my daughter preserved the skin! Waste not, Want not!
Disclosure: This post contains no affiliate links, However, I am Amazon Affiliate and may receive a small compensation for including links on my blog. Buying through my links is not necessary, just appreciated. Amazon does not charge extra for linked items recommended by their affiliates. I only recommend products that I use and trust OR plan on using in the future. Please buy responsibly and do your own product research before buying anything online.
Labels:
anatomy
,
Cooking
,
eating
,
experiment
,
free
,
home making skills
,
homeschool
,
homestead
,
homesteading
,
kids cooking
,
lesson plans
,
life skills
,
snake
,
survivalist
Monday, June 16, 2014
Don't be a ROTTEN Egg!
This post contains affiliate links.
Recently, the son and I went to a small 'Mom and Pop' country store down the road from my mom's house. I had forgot to get eggs and they were selling fresh eggs from the owners own chickens. My daughter was not with us and she looked at the eggs with an odd look and said, 'How do we know they are really fresh?' Well now, that is a good question! And, a pretty good lesson for the day! (And honestly, I was a little leery buying fresh eggs from someone I did not know!)
I remembered this post I saw on Facebook a little while back and I (very smart like) remembered to save the photo! The Chicken Chick let me know who to give the credit to. Gail Damerow's book Storey's Guide To Raising Chickens contains this excellent picture graphic to let you know how to tell if an egg is fresh or not. Of course we had to try! (And the book is now on my Wish List!)
Recently, the son and I went to a small 'Mom and Pop' country store down the road from my mom's house. I had forgot to get eggs and they were selling fresh eggs from the owners own chickens. My daughter was not with us and she looked at the eggs with an odd look and said, 'How do we know they are really fresh?' Well now, that is a good question! And, a pretty good lesson for the day! (And honestly, I was a little leery buying fresh eggs from someone I did not know!)
![]() |
| Photo from Gail Damerow's book Storey's Guide To Raising Chickens |
I remembered this post I saw on Facebook a little while back and I (very smart like) remembered to save the photo! The Chicken Chick let me know who to give the credit to. Gail Damerow's book Storey's Guide To Raising Chickens contains this excellent picture graphic to let you know how to tell if an egg is fresh or not. Of course we had to try! (And the book is now on my Wish List!)
The eggs sunk like a ton of bricks and landed flat on the bottom! We cheered every egg we sunk! Fresh indeed! And at $2 a dozen for super large eggs, it was quite a steal. This activity was simple and yet it is another important skill every 'Well Prepared' child should know. You never know if you will have to barter or trade or buy from someone and want to make sure what they are selling you is fresh! (Can't wait to try on some eggs from the local 'big box' store!)
UPDATE: My mom called to tell me a funny story. While Zoey was at her house, she wanted to eat eggs for breakfast, but my mom didn't know how fresh they were. My daughter told her, "Hold on Grandma, let me show you how to tell!" She got out a bowl of water to test the eggs freshness. THEY ALL FLOATED! She turned to her grandmother and said, "Grandma! How long have you had these?" Haha!
Disclosure: I am Amazon Affiliate and may receive a small compensation for including links on my blog. Buying through my links is not necessary, just appreciated. Amazon does not charge extra for linked items recommended by their affiliates. I only recommend products that I use and trust OR plan on using in the future. Please buy responsibly and do your own product research before buying anything online.
Labels:
chicken
,
eggs
,
experiment
,
free
,
fresh
,
home making skills
,
homeschool
,
homestead
,
homesteading
,
kids cooking
,
lesson plans
,
life skills
,
little house on the prairie
,
test
Sunday, June 15, 2014
Cooking On the Wood Burning Stove
This post contains Affiliate Links.
When you are raising a well prepared child it is essential they know how to cook for themselves on a variety of cooking sources. One of our favorite winter activities is cooking on the wood burning stove.
Taco meat on the stove was our actual inspiration for doing the Tuna Can Burner Experiment. To get the meat to cook, we had to get the fire nice and HOT! It had been cold all that afternoon, but by the time we started cooking, we were sweating by the fire. We brainstormed ideas on how to cook with out having to have a super hot fire. Our electricity goes out more in the summer than in the winter.
When you are raising a well prepared child it is essential they know how to cook for themselves on a variety of cooking sources. One of our favorite winter activities is cooking on the wood burning stove.
Taco meat on the stove was our actual inspiration for doing the Tuna Can Burner Experiment. To get the meat to cook, we had to get the fire nice and HOT! It had been cold all that afternoon, but by the time we started cooking, we were sweating by the fire. We brainstormed ideas on how to cook with out having to have a super hot fire. Our electricity goes out more in the summer than in the winter.
Chicken Fajita Soup
1 Can of Corn
2 Cans of Ranch Style Beans
1 large Can of Petite Diced Tomatoes
1 Can of Rotel Diced Tomatoes and Chilis
2-3 Large Chicken Breasts Boiled and Shredded to bite size pieces
1 Large Onion sauteed till tender
4 slices of American Cheese or a 1 in block of Velveeta
Fajita Seasoning to taste
(The affiliate links listed above are for example only. The prices at your local store are much better than the ones I found on Amazon.)
Open all cans and pour directly in to a large pot. Do not drain the cans! Add remaining ingredients. Use the Ranch Style Bean cans to fill with water and pour into the pot as well. Let simmer for 10-20 Minutes.
Top with shredded cheddar cheese, fresh diced tomatoes, sour cream, onions, and/or tortilla chips.
YUM!!
For info on the benefits of cooking with kids, please visit these websites...
Disclosure: I am Amazon Affiliate and may receive a small compensation for including links on my blog. Buying through my links is not necessary, just appreciated. Amazon does not charge extra for linked items recommended by their affiliates. I only recommend products that I use and trust OR plan on using in the future. Please buy responsibly and do your own product research before buying anything online.
Labels:
Cooking
,
eating
,
free
,
fresh
,
home making skills
,
homeschool
,
homestead
,
homesteading
,
kids cooking
,
lesson plans
,
life skills
,
little house on the prairie
,
survivalist
Saturday, June 14, 2014
Water Filtration
This post contains affiliate links.
Every Survivalist/Prepper should know how to filter out muddy water to be drinkable! My daughter wanted to see if she could take water from the mud puddle and filter it. First we youtubed some videos and researched 'Water Filtration For Kids' and found lots of good info. Then she went outside and got water from the mud puddle she had splashed in all day. This is what it looked like:
Not a very pretty sight! I asked my daughter what she thought we should do next. She wanted to see what it would look like if we waited. Her theory was if our soil samples from the Soil Sample Project settled and cleared the water a little, than maybe the same thing would happen if we left the muddy water sit for a little while. So we waited.
Now that is better! We did not try to drink it. The whole pee smell thing completely ruined it for us. (and honestly, I was not sure how safe it would be. Can't risk my baby's life in the pursuit of survival.)
Every Survivalist/Prepper should know how to filter out muddy water to be drinkable! My daughter wanted to see if she could take water from the mud puddle and filter it. First we youtubed some videos and researched 'Water Filtration For Kids' and found lots of good info. Then she went outside and got water from the mud puddle she had splashed in all day. This is what it looked like:
Not a very pretty sight! I asked my daughter what she thought we should do next. She wanted to see what it would look like if we waited. Her theory was if our soil samples from the Soil Sample Project settled and cleared the water a little, than maybe the same thing would happen if we left the muddy water sit for a little while. So we waited.
After just one hour it settled quite a bit, but, we wanted to see if it would clear up on its own if we let it sit overnight.
It did not completely clear. She saw a slight separation in the jar about mid way. I asked her what she wanted to do next, and she decided to wait.
In 48 hours the super fine dirt had settled in the bottom of the jar on top of the other dirt. At this time, my daughter got out her science journal and documented what she observed. We decided we would wait to see what would happen next. Unfortunately, we had to make a sudden trip out of town and had to leave our project where it sat in the bathroom window. My daughter had worried about her project the whole time, 'Momma, it was already starting to get green!' We came back 2 days later to this...
And that really does not look to bad until we got close up and really looked...
You really can't tell by this photo, but the film actually looked... FLUFFY....
and what the heck was this?
She decided to filter it anyways.
The first filtration she tried was to pour
the water through coffee filters alone.
This is what was removed.
This is what she ended up with. Not too bad! :)
She looked at me and said, 'But can we drink it?' I didn't know! But I highly doubted it! So back to Google we went to do some research. We found out you need something to kill out the tiny micro organisms and bacteria that might be living in it. We decided to try the rock, sand, and activated charcoal method. She cut a 2 liter bottle in half and placed the top of the bottle upside down and into the lower half. Then she placed coffee filters into the bottom and layered the charcoal, rocks and sand.
It seemed the more we filtered it, the more yellow it became. The one on the left is our filtered water. The one on the right is water from our tap. HUGE difference in color. AND it smelled like pee! Why would it smell like pee? We consulted a group I am in on facebook and they asked what kind of charcoal we used. Well.... apparently all charcoals are not the same, and the charcoal we were supposed to use was activated charcoal, not Daddy's charcoal he makes us grilled pork chops with. Whoops! It was suggested we use bleach to kill out any microorganisms and bacteria.
SIDE NOTES: More research is being done to figure out how to be able to take puddle water and make it drinkable. That was the whole point in the first place! An observation my daughter made was we ended up with a fraction of the water we started with. She was amazed at the amount of water that was lost in the process and came to the conclusion that the coffee filters soaked up too much of the water to be useful. Did you notice my daughter was not in the pictures doing the project? That is because she asked if she could 'document' the project on her own this time. :) My baby is a researcher and knows to document!
Love this topic and want to see a little of what we researched?
Preppedandprepared.com is no longer available, but you can still find PK on her own You Tube channel.
Disclosure: I am Amazon Affiliate and may receive a small compensation for including links on my blog. Buying through my links is not necessary, just appreciated. Amazon does not charge extra for linked items recommended by their affiliates. I only recommend products that I use and trust OR plan on using in the future. Please buy responsibly and do your own product research before buying anything online.
Labels:
coffee filter
,
experiment
,
filter
,
filtration
,
free
,
home making skills
,
homeschool
,
homestead
,
homesteading
,
lesson plans
,
life skills
,
little house on the prairie
,
muddy
,
science
,
splash
,
survivalist
,
test
,
water
Subscribe to:
Posts
(
Atom
)


.jpg)