Enter your email address:

Delivered by FeedBurner

Homeschooling The Well Prepared Child: food preservation
Showing posts with label food preservation. Show all posts

Monday, February 22, 2016

Wild Foraging: Beauty Berry Jelly

This post contains Affiliate Links.


     For years, I told my son, "Don't eat the purple berries! They will kill you!" For years, I believed, "If you could eat it, it would be in the store." Right? 
     Fast foward a few years later, I was over on Foraging Texas when I stumbled upon his page American Beauty BerryWell, as it turns out, you CAN eat the purple berries! We have several bushes on our property. However, by themselves, they are not so great and they really don't have very much nutritional value. Not poisonous, but not really a great find for foraging. Boo. Then I heard about Beauty Berry Jelly. Most that have tried it say it has an intriguing, yet delicious taste to it. Zoey and I decided we were going to make some. 
     
     
     Finding the brightly colored berries was easy. Picking them was pretty easy as well. You just slide your hand down a branch and pop them off right into your bowl. When they are on the branches, their looks like a whole lot of berries. However, even after we stripped nearly all of the bushes in our yard, we were not sure if there was going to be enough to make the jelly with. We were going to try anyways. 

"Hey Zoey, let me get a picture of you and the berries before we go inside."


      Yes, she looks like her daddy, but this kid is sooo me! :D 

     First the berries had to be picked through and washed thoroughly. We ended up getting leaves, twigs and bugs in with them. I did not get a picture, but I figure you don't want to really see all that anyways. Then we looked for recipes to make our jelly. The best one we found was at Hogtown Home Grown. I did not have Low Sugar Pectin or Raw Sugar so we followed the directions on the back of the package of Sure-Jell that we did have and used regular sugar.  We followed her instructions except for that. 

This is what the berries look like after being boiled. 


Zoey mashed them.

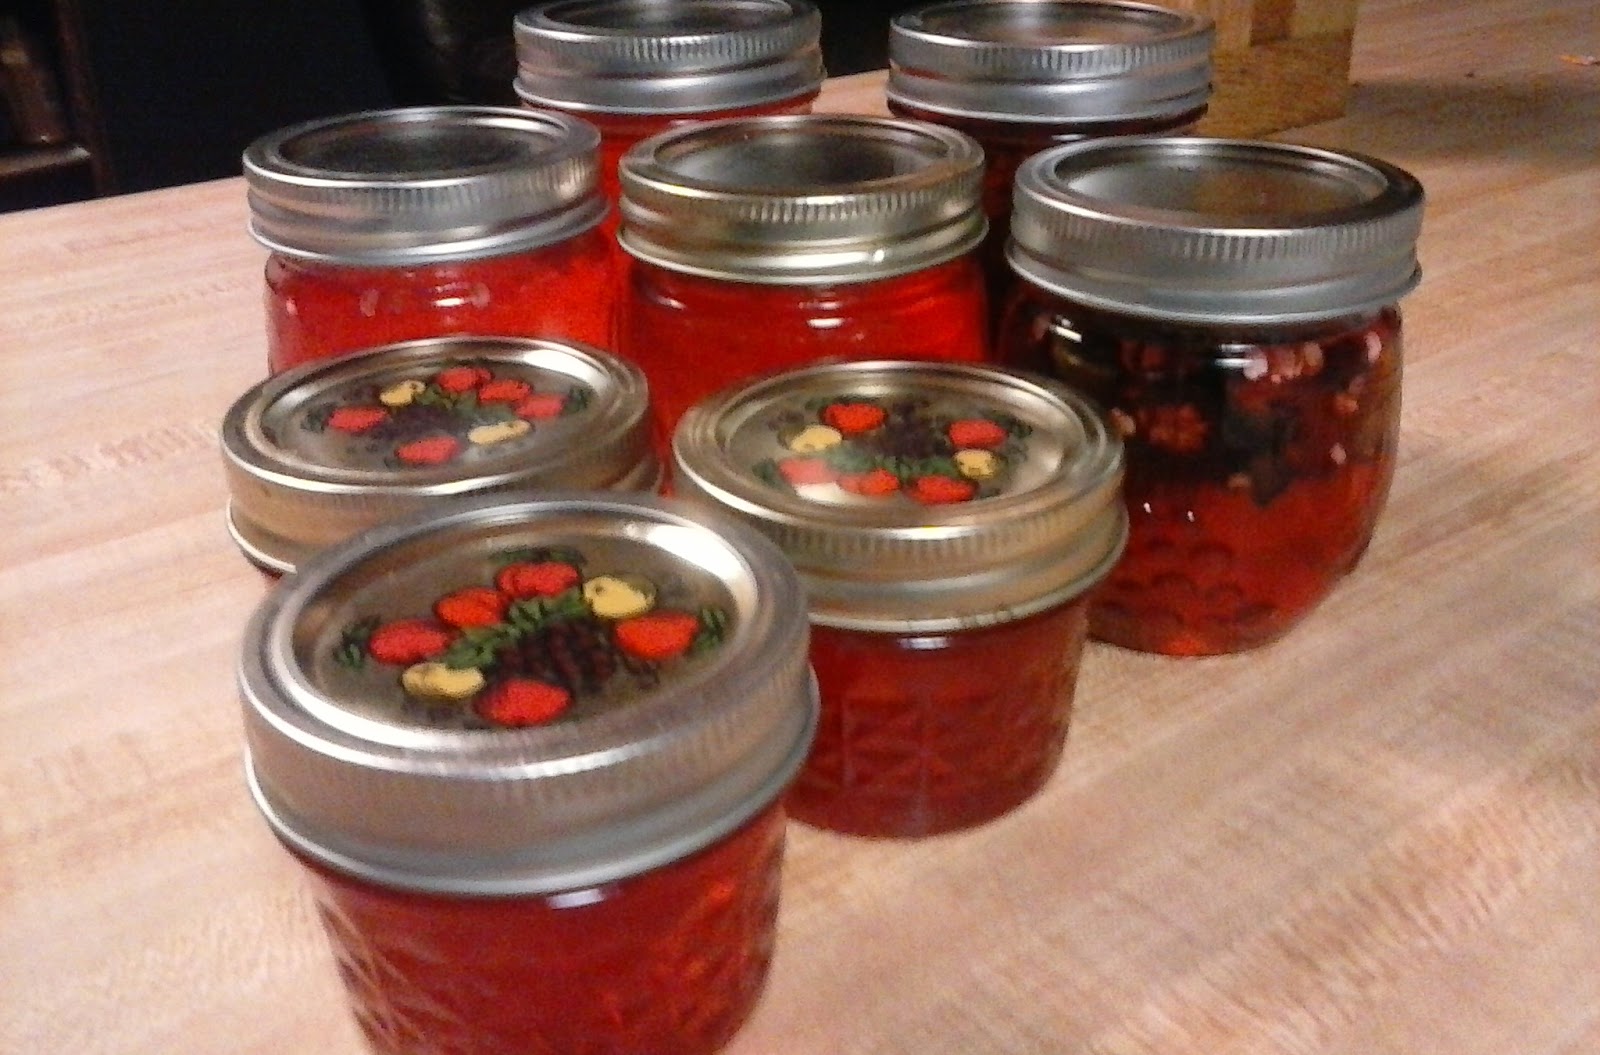
By this point we have boiled down the mixture, added the sugar, lemon, Sure-Jell and we are now ready to start loading our jars. 

      We filled 6 of the 8 oz. Jelly Jars and 3 of the little 4 oz. Jelly Jars. There was also a little left over that we nibbled on.  So how does it taste? It is really hard to describe. Definitely not your ordinary grape jelly! It has a more... sophisticated.. taste to it? AND IT IS AMAZING! It has replaced our favorite jellies on everything from PB&J to buttered biscuits. 


We can't wait to make it again this August!   


Get the recipe Here:


Learn More About American Beauty Berry Here:


Please use extreme caution when foraging for wild edibles. Do your own research. We are not responsible for any misidentifying of plants you make while on your own. Never eat anything you are not sure of.

Disclosure: I am Amazon Affiliate and may receive a small compensation for including links on my blog. Buying through my links is not necessary, just appreciated. Amazon does not charge extra for linked items recommended by their affiliates.  I only recommend products that I use and trust OR plan on using in the future. Please buy responsibly and do your own product research before buying anything online. 

Monday, July 13, 2015

Green Beans!

This post contains Affiliate Links.

     Green beans.. grown in our garden, hand picked by us, no pesticides, insecticides, or chemicals of any kind, and Pressure Canned by us! I feel like running around singing that Flashdance song, What a Feeling. (Seriously, especially after I looked it up!)
     Remember last week, when I found Zoey reading our canning cook book? Well, that night we took the plunge and finally opened the box to our Pressure Canner. I had gotten it for Christmas from my mom, and never opened it. I didn't want to can store bought produce but now we had finally picked enough of our home grown green beans to be able to can our very own. 

     First we washed, trimmed and cut our beans into the length we wanted. Then, we followed the easy steps in our pressure canning cookbook, The Organic Canner by Daisy Luther.  Daisy's cookbook is easy to follow and follows all of the technical guidelines, with out all the technical talk that intimidates most newbies. It reads as if a seasoned canner is talking to you and sharing their recipes. (The background story for her recipe "Renegade Taco Sauce" is pretty funny too!) This book covers her favorite recipes from fruits and veggies, to sauces, meats and meals in a jar. We love this book. :)

Okay, back to canning.. Here are some photos.
It took a lot longer to cut and prepare the beans than what we thought. 
Forgot to get photos of us filling the jars, but here is how they looked in our canner. 
We squealed a lot at this point.
Look how excited she is! We started this project around 7, but by the time we got everything prepped and ready, it was well after 11 p.m. She took a shower while we waited for the steam to build up in the canner. 
We only had enough green beans for 5 pint size jars. We used 2 water filled jars to fill the canner the rest of the way.  


All finished! What a beautiful sight! 

ISSUES:

     The only 'issue' we had with the recipe, (and really, it was not a big issue) was how much salt to add to the jars. Daisy says to add salt if you would like, but she didn't say how much. We did some online research for recipes, and decided to add 1 tsp. It made me nervous that we might have added too much. We would just have to wait until we ate a jar to find out. 

So How Did They Taste? 

     Oh my goodness! They were amazing. I think we will only add a 1/2 teaspoon of salt to them next time though. We like to add Lawry's Garlic Salt to our green beans and after we did, it was a bit too salty for my taste. Kids loved them though. Zoey and I have told everyone we know. WE CANNED OUR OWN GREEN BEANS! AND they tasted and looked like regular canned green beans! I know that is odd to say, but when you are raised on Green Giant green beans,  and rarely eat fresh.. you want your family to recognize them and want to eat what you canned! 

Will We Be Pressure Canning Again? Was it worth it? 

      Oh yes! AND YES! Actually, we have already pressure canned another of our garden goodies. I will show you that one later. The satisfaction and joy of taking a little seed, making it a home in your garden, watering it, watching it grow, mature and produce FOOD and then preserving that food for later use by your family, is one of the greatest feelings we have ever felt. Well worth it!

So excuse me while I end this post and go on singing... 


~Take your passion
And make it happen
Pictures come alive
Now I'm dancing through my life~

What a feeling...


Book Review Info: Daisy Luther sent me her book for a review but also, really so my daughter and I could learn to pressure can. I was not paid for this review and all of my opinions and statements are purely my own. We honestly love The Organic Canner

Disclosure: I am Amazon Affiliate and may receive a small compensation for including links on my blog. Buying through my links is not necessary, just appreciated. Amazon does not charge extra for linked items recommended by their affiliates. I only recommend products that I use and trust OR plan on using in the future. Please buy responsibly and do your own product research before buying anything online.

Wednesday, December 3, 2014

Getting More From Your Chicken: Freezing Chicken Bone Broth


     Small steps to being self sufficient! Raising, butchering, cooking, and preserving our own meat! We sent a rooster to freezer camp yesterday. Today, I roasted it and we ate it for dinner. It was the best rooster we have had so far! Three of us ate from it tonight, and I froze up 2 meal size packages of chicken for future meals. Right now, I have bone broth simmering on the stove. I plan on freezing it in different size containers and then repackaging them into a gallon size baggie when the are frozen. I did this last time, and used muffin and quart size frozen broth for things like gravy, soups and mashed potatoes, or some good ol' broth for a cold!. Mmmmm... my house smells so good!


What I put in my chicken bone broth:
  1. 1 full chicken carcass broke up as best as possible. Breaking the bones helps to insure you get all of the healthy bone goodness. My carcass came from roasting a whole chicken.
  2. About 1 cup of diced raw carrots that were from our Thanksgiving dinner a couple of days ago.
  3. About 1 cup of diced raw celery, also from the veggie tray.
  4. 1 clove of garlic, chopped and smashed
  5. 1 small onion diced (it was about the size of an egg.)
  6. Salt and Pepper to taste.
Next, I simmered it for about 3 hours. The remaining chicken meat had fallen off of the bones. The garlic and onions had dissolved into the broth and the carrots and celery were super tender. I strained the broth into another pot. Zoey and I munched on the celery and carrots for a bit before adding the strained portion into the pigs slop bowl. The bones went into the garden to compost. 


I dipped out 2 cup portions into recycled lunch meat packaging. These are very convenient when using for recipes. You can also dip out larger portions as well.


When they were frozen, I just popped them out of the plastic bowls and put them in labeled gallon freezer bags.


I also measured out 1 cup servings into muffin tins. I DO NOT recommend using disposable tins unless you just do not care about reusing them. When you pop the little frozen broth circles out it crushes them. Warming the bottom of them for a second might help with preserving them. I do not have any other kind of muffin pans. I picked these up at a local grocery store for .88 cents each. I would prefer to keep them but it will take a bit of work to get them back into shape.. We will see if my patience holds out.


Once Frozen, I placed them in a gallon freezer bag as well. Now when I need a quick pick me up when I start to feel sickly, I can just pop one in a coffee cup and microwave it. Although, the nutrients would be better preserved if I put it in a sauce pan to reheat. These work great for making mashed potatoes and gravies as well. 


     I would really like to learn how to can my chicken broth, but honestly, I'm a bit 'chicken' to try the pressure canner my friend loaned to me. Like I said, baby steps... At least I'm walking the walk towards self sufficiency... baby steps or not! 
What are you doing to become more self sufficient?


Sunday, November 30, 2014

Our First Jelly- Red Jalapeno


We are not very big jelly eaters. Maybe every once in a while we will eat it, but not enough to get all crazy about canning jelly. We ended up with a whole lot of jalapeno peppers from our garden and our amazingly awesome neighbor, Bree, brought over more. I didn't know what to do with all of these peppers, we are not big pepper eaters either! Good grief, so many peppers, so little eating going on! My sister and brother in law are huge spicy food lovers. In the past, I have bought Jalapeno Jelly for them from a friend of mine. So, why not make something jalapeno for them? 
     My first idea was actually more like a jalapeno syrup you pour over a cream cheese bar and eat on crackers. For the life of me, I couldn't find a recipe for it, and no one I talked to in my canning groups really even knew what I was talking about... But I know I have eaten it somewhere before. After about a week of asking and researching, I finally gave up. Jalapeno Jelly it is! 
     I found a recipe on Taste Of Home that I thought looked pretty easy. Zoey and I got to work! I sliced up all the jalapenos (with gloves on) but we could not get our hand crank chopped to dice them up in small pieces. We went ahead and boiled them sliced. Zoey added all the ingredients, including some red food coloring. She did not think it looked very yummy in it's normal light yellowish color. I poured the extremely hot liquid into the jars. We did not strain the jalapenos from the liquid, like the recipe calls for. We strained the jalapeno slices into 2 of our jelly jars and then added the jelly liquid over them. After all of our jars were filled, we water bathed them for 5 minutes.
     The jelly set perfectly, except for the 2 we left the jalapeno slices in. They were more syrupy. Yea! Maybe we figured out how to make the yummy syrup to pour over cream cheese? We ended up with 8 jelly jars. (I don't even know what size they are. They were given to us from a friend on Facebook.) There was a tiny bit left over that would not fit into the jars. We poured it into a small bowl and placed in the refrigerator. After it had set, we tried a little on toast with butter. I was really surprised; it was good! Not too spicy, but sweet with a kick to it on the end! 


     I gave my sister her jar, they have yet to open it. They are saving it for a special occasion to eat over cream cheese. I'm a bit disappointed. I really wanted them to try it and tell me how it was. I thought at least with Thanksgiving in full swing, they would have eaten it sometime or another... Nope. 
    On Thanksgiving with my in-laws, Zoey decided to pull out all of our food stuffs we have been preserving and show EVERYONE! She wanted to open a jar of the jalapeno jelly for everyone but I didn't really want a jar open that would sit in our fridge and spoil. When she showed my father in law the jelly, he asked to try it. HE LOVED IT! He snuck the remainder of the jar into his jacket pocket to take home. Zoey was so proud and beamed her radiant smile. Feels pretty good to finally have someone like our jelly. He might be getting some more for Christmas (his suggestion!) 


Hot Pepper Jelly from Taste Of Home

1/2 cups white vinegar
1 medium sweet red pepper cut into wedges (we used neighbors mixed peppers)
2/3 cup of chopped habanero peppers (we used regular)
6 cups of sugar, divided
2 pouches (3 ounces each) of liquid fruit pectin
1 teaspoon of red food coloring (optional, try green too)

Directions
1. Place vinegar and peppers in a blender; cover and puree. Add 2 cups of sugar; blend well. Pour into saucepan. Stir in remaining sugar; bring to a boil. 
2. Strain Mixture and return to pan. Stir in pectin and food coloring if desired. Return to a rolling boil over high heat. Boil for 2 minutes, stirring constantly. 
3. Remove from heat; skim off foam. Carefully ladle hot mixture into hot sterilized half pint jars, leaving 1/4 in headspace. Remove air bubbles, wipe rims and adjust lids. Process in a boiling-water canner. 
4. Serve with cream cheese on crackers

Yield: 5 half Pints

Editor's Note: When cutting hot peppers, disposable gloves are recommended. Avoid touching your face. The processing time listed is for altitudes of 1,000 feet or less. Add 1 minute to the processing time for each additional 1,000 feet of additional altitude. 

Now this recipe is taken verbatim from Taste Of Home. I have tried this recipe and had great results. If you have a problem with this recipe or any recipe from them, please contact them directly. They are serious about wearing gloves and not touching any part of your body when handling any hot peppers. Peppers contain oils that are hard to get off of skin and will burn you like wild fire! Use extreme caution! If you happen to get some on yourself, soak the affected body part in milk. Raw milk is best, but my milk in the fridge helped as well.   

Also, I am in no way affiliated with Taste Of Home. I am just passing on a recipe we happen to enjoy. :)


Monday, October 20, 2014

Things I Learned From My Grandparents (and didn't even know I was learning)


   Some of the best memories I have as a child, were my summers with my grandparents on their homestead. They had a little plot of land up in Chihuahua Valley, in the San Jacinto Mountains. They cleared the land, built their house, and prepped for winter. Always improving, always amending always preserving. As a child, I didn't realize that was what they were doing, all I knew was that at Grandpa and Grandma's house, things were wonderfully different. More natural, more like what what I read in my 'Little House' books.
     Instead of a back yard, they had a strawberry garden. It was on a an incline, but there were rows and rows of strawberries. One year, while I was hunting for strawberries, I ran my hands over the plants and screamed. There was a large snake hiding under the strawberry plants. I ran to my grandpa to tell him. He got a shovel and went over to get rid of the snake. However, when he got over there, the snake turned out to be the garden hose. We all got a good laugh out of it.
     There was a large garden in the back of the property. Grandpa was always in the garden hoeing, planting, tilling, weeding, and/or raking. He worked from sun up to dinner time. Sometimes we would help him. My brother and I would go out with grandpa early in the morning and pick vegetables with him. He had the most amazing tomatoes in all shapes and sizes. We would munch on small yellow and cherry tomatoes as we picked. There were rows of beans and and purple hull peas. We picked okra that my grandma fried up fresh and froze the rest. When we were finished, I would sit on the back porch with Grandma and snap beans. Every once in a while, I would pop a fresh bean into my mouth. 
    Grandma also had cans with herbs growing in coffee cans on the back of the house. We nibbled on fresh mint while we played on the grass. It made our mouths feel cool and fresh. Every once in a while, Grandma would ask us to pick some of the herbs. We watched as she cleaned them and then laid them on a cookie sheet lined with paper towels to dry. 
     Grandpa had a snake in the wood pile we called his 'pet.' Every morning grandpa would go out to the woodpile he was greeted by a scarlet king snake. It never harmed anything and my grandpa told us that the snake helped to keep those pesky rodents away. Grandpa would talk to the snake as if it was his friend. Not all snakes were his friends though. One day my cousins, brother and I were walking past the propane tank and Grandpa was coming towards us on his way to his neighbors property. He turned suddenly and walked over to his gardening shed at a brisk pace. We were already at the house when we noticed Grandpa going back towards the propane tank with a shovel. Suddenly, Grandpa was striking at something on the ground. We ran over to see what was happening. Grandpa hollered to "Stay Back!" It was a rattlesnake! AND we had just walked past there and never saw it! Grandpa killed it effortlessly. When he severed the head, we came in a bit closer. Grandpa cautioned us to not get to close and explained when a snake dies, it can still hurt you. He held the shovel up to the snakes mouth. We all gasped as the snake bit at the shovel. Grandpa moved the shovel to the body and the body STOOD up and tried to strike at the shovel even though it had NO HEAD! Although it had no eyes, it followed the movements of the shovel perfectly. We marveled at the snakes body as it continued to move after being decapitated. It seemed like it took forever to stop wiggling along the ground. We paid more attention from now on while walking around the property. 
     When we came into the house from outside, the back door led to the utility room. We had to be quick on the ins and outs so flies could not come in and the air conditioning could not get out. We were not allowed to keep coming in and out either. Once outside you stayed out side for a while. Coming in had the same rule. Grandma explained this helped to keep their electric bill down. We had to leave our shoes by the back door to keep the dust and dirt out of the rest of the house. In the utility room, Grandma always keep an ice cold water jug for us. We could drink as much as we wanted, but you better make sure you did not waste any. It was from the well and we didn't need the well running dry. On the washer and dryer was usually homemade raspberry gobbler from the berries we collected for Grandma. It was one of the best things I have ever put in my mouth. 
     
     
     I loved watching my grandmother sew and mend clothes. She made nearly all of her clothes. It was almost like magic when she made skirts and shirts, curtains out of thin pieces of paper, pins and fabric. After cutting her patterns out, the neatly folded them back up and placed them back in their packaging, to be used at a later time. I watched silently as her sewing machine quickly and easily joined the fabrics. My Grandma crocheted as well. She taught me how to make chains and simple crochet loops. I would play with my long piece of yarn over and over, practicing until I could get my links and chains just right. I couldn't have whole ball of yarn until I mastered the beginning stages of crocheting; yarn could not be wasted. 
       I slept in the spare bedroom on a sleeper couch. The room doubled as Grandma's sewing/craft room and her extended pantry. There was one wall that had built in shelves lined with items my grandma had canned. Rows upon rows of the most amazing looking food items. Jams, jellies, relishes, vegetables, fruits, and meats. Chow-chow was one of my grandmother's specialties. Oh, how I hated chow-chow as a child. Now I plan on making it one day so I can try it again. She made the best dill pickles. Fresh dill flower heads graced the jar. I tried eating one once, it was horrible, and I couldn't figure out why on earth someone would put a weed in with the glorious pickles. I never saw my grandma can, but I did get to watch her make jelly out of the fresh strawberries from their patch. It seemed like a lot of work, but the jelly was well worth it! I always wondered why just two people would need all of that food. There were so many of them! At night I would lay there and look at the wall of jars, counting them by the moonlight until I fell asleep. 
     For the longest time, I wondered why most of my memories with my grandparents seemed to center around food. It was not until I started my own homesteading journey that I realized why. They lived on a fixed income, Grandpa's retirement. Everything the did around the mountain property was to prepare for everyday life. From food preservation, to chopping wood, to recycling, reusing, re-purposing, DIY, it was all about survival. Not in the sense of what people think of prepping and survivalist skills now. This was day to day, what they learned from their parents, this was natural for them. 

     By watching them and joining them in their everyday tasks. I learned. I didn't realize it at the time, but I was learning from them. Everything that I watched and did as a child has become so 'natural' for me now. Even though I never actually was taught how to sew, I 'naturally' knew how to. I say I was self taught, but in essence, watching my grandmother sew, taught me how. I am also a natural gardener, saver, recycling/re-purposing, homesteading, DIY, make your budget stretch type of person. I wish my grandparents were still with us today. I would make sure I asked the questions I missed being able to ask them when I was young. At least I have my memories. These are memories I want for my children. I want the ability to take care of their families to be 'natural' for them. Children mimic and take on the habits of those they are around. I hope to pass on to my children what my grandparents pass on to me. 

The pictures in this post are not of me and my brother. They are of my cousins, Erin and Garrett. Their mother was a lot better at preserving memories through photography than my family was. Thank you Erin and Garrett, for finding these photos for me. Love you!

Saturday, September 27, 2014

Save The Seeds!


"All the gardening knowledge in the world will be of no use, 
if you do not have seeds to sow." Kamay Flemens

     For years we have saved seed packets from various stores. Just recently choosing to buy heirlooms to grow and save. Heirlooms are seeds that have been grown, harvested, and saved from generation to generation. However, seeds bought in packets, do not last forever. My endless thoughts of 'what if there were no stores' prompted me to get serious about saving our own seeds from the garden. Because I believe in teaching and learning as a family, we researched how to save seeds, picked the best fruits, and harvested them together. (Although, my daughter actually did most of the seed harvesting for us. I assisted and took photos. :) )
     I heard once, when saving seeds, to use the best of the best. Best plant, best producer, best tasting fruits and vegetables. We did not harvest seeds from our mini plants because we never want mini plants again! We still have plenty of the cherry tomato seed packets, so we did not save those either. We also choose plants we knew we would eat or be able to use for trade or barter. There is no point saving seeds from plant varieties your family turns their noses up to unless you have another use for them. 
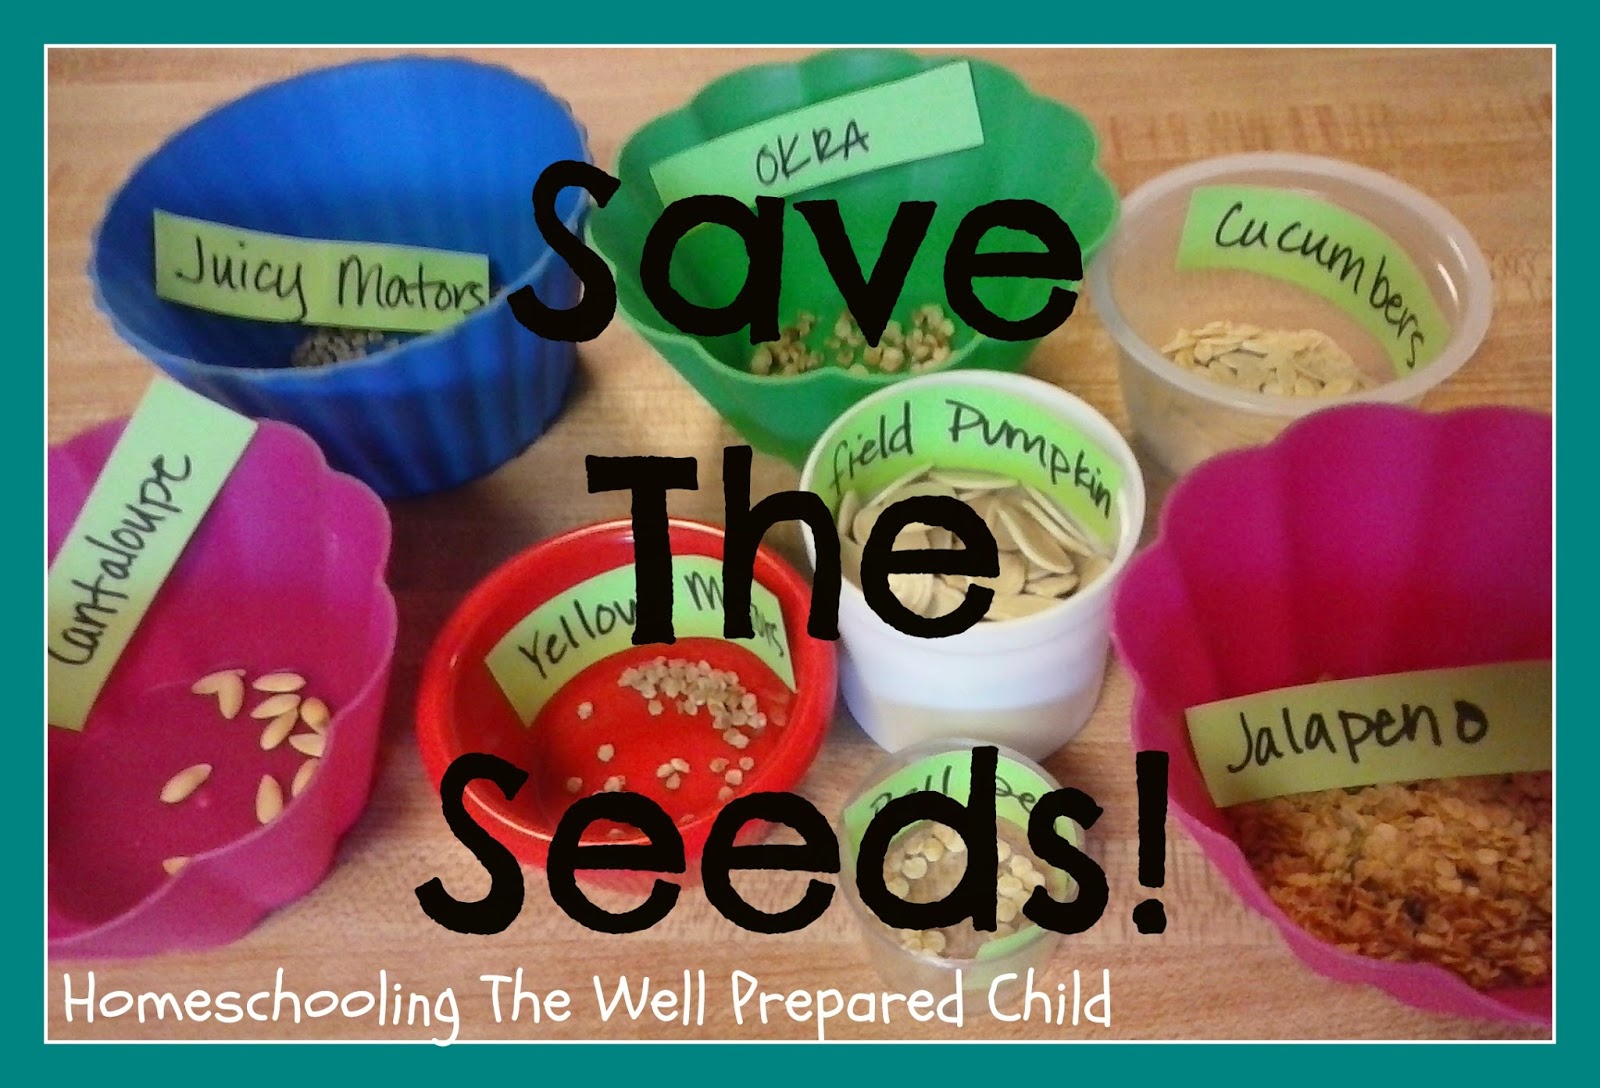
     Here is a bit of what we saved. Not everything was photographed...


Okra- Carefully split the okra length wise, being careful not to cut the tiny seed balls. Use your thumb to gently pop the seeds out. When finished, make sure all green plant material is removed. Set aside for a week or two to insure full dryness. I am interested to see if this worked. They looked nothing like what I used from my store bought seed packet. 

 They dried all wrinkly and I don't remember the seeds in the packet looking quite like that. This photo is before they dried fully. 


Field Pumpkins- Carve open pumpkin top and remove all seeds. Rinse seeds in a strainer and make sure all pumpkin pulp is removed.  They sat in the strainer for a few hours so that most of the water dripped away. Then, we placed the seeds on a plastic plate and moved them around often to insure even dryness and to keep them from sticking together. 
Cucumbers- While making pickles, we had tons and tons of seeds left in the bowl from cutting the cucumbers. My daughter just collected them from the bottom of the bowl and took out all the seeds that had been cut in half. She used a strainer to wash them and make sure there were no pieces of flesh with them. Just like the pumpkins, we let them stay in the strainer for a few hours to make sure the excess water had time to drip off. 


Jalapenos- Although we do not eat these much except for in salsa and for spicy pickles, we saved the seeds from some jalapenos we used for a FAIL at cheddar poppers. While we cored them, we dropped the seeds into a bowl. They dried in the bowl for a couple of weeks.
 (When harvesting seeds from any spicy pepper, please use gloves! USE THEM! The seeds and the core are spicier than the green flesh. Even though I washed my hands thoroughly, and my hands did not burn, everywhere I touched on my body after that BURNED LIKE WILD FIRE! I just so happened to be suffering from allergies and had itchy eyes. It was brutal! If you do happen to get burned by the oils in the jalapenos, milk helps. I used a washcloth to scrub my hands and face with the milk. Raw milk from any source is better. Raw sources include cows, goats and even humans. Yes, booby juice works too, or so I hear.. no booby juice around my house anymore.)

Cantalupe- A friend of mine brought a cantaloupe to me from her father's garden. It had a lovely texture and was sweet and juicy. After digging out the seeds from the center, I placed them in the strainer and washed all the goo away from them. They drip dried and were placed on a plate to finish the drying process.  

Bell Peppers- They have been a test this year. They were not as big as a store bought bell pepper. I am not a big fan of them, but I wanted to use them in salsa. I never got the chance. We did not have the tomatoes we needed at the time to make salsa with them. When we had tomatoes, I had already cut up the bell peppers to save seeds or had given them away. We did test eat them raw. It is not something my family enjoyed. They will be good for trading and bartering if needed. 

Tomatoes- Now this one I will go into more depth on in another post. They are a huge staple in my household and I believe we could nearly live off of them. My whole family loves tomatoes. Before we got serious in seed preservation and looked up how to save tomato seeds, we tried a couple of ways to dry the seeds. First, we took the seed pulp from a tomato we cut and placed them on paper towels. The seeds stuck to the paper towel as it dried and they were not very nice looking. I tested one to see if it would germinate, and it did. Then we brainstormed ideas on how to do it so they would come out cleaner.. but that is all in THIS  post. :)

     Now at this point, can you imagine what my kitchen looked like? There were plates, cups, bowls, and paper towels all over the place. It drove me nuts! I don't have very much room in our house. There is no pantry, laundry room, spare room at all to store all of the drying seed containers we had at this point. I finally got smart and gathered every small container we have and put all of them in a casserole pan. Safe, secured, compact storage! It took a few weeks to actually feel they were all sufficiently dry enough to store away.  We used a variety of different small recycled packages to store our seeds in. A variety, because, we couldn't eat enough Tic Tacs fast enough. We are all about FREEcyle! :D 


     Have you tried seed preservation? 
Save The Seeds!
     
More great seed saving advice and FREE PRINTABLE SEED PACKETS at 104 Homestead

For a great definition of heirlooms, hybrids, organics and all the other seed lingo, check out Underwood Gardens post. 

Want to start your own vault of survival gardening seeds without preserving them yourself?  Survival-Seed-Vault-
     

This post contains my Amazon affiliate link to a survival seed vault. Although, I have not ordered from them, it is something I would like to purchase in the future. If you happen to buy one, let me know what you think of it!